MySQL is a widely used open-source database management system, often installed as a component of the popular LAMP stack. It follows the relational model and uses Structured Query Language (SQL) to manage data. This tutorial will walk you through installing MySQL 8.0 on an Ubuntu 22.04 server. Once completed, you will have a fully functional relational database for developing your next website or application.
Installing MySQL
1. First, update the package index on your server by running the following command:
sudo apt update
2. Next, install the MySQL server package by running the following command:
sudo apt install mysql-server
3. Once the installation is complete, you can enable the MySQL server to ensure it starts automatically after restarting. To do this, run the following command:
sudo systemctl enable mysql
4. Finally, you can start the MySQL server and ensure that it is running by running the following command:
sudo systemctl start mysql
Or
sudo systemctl start mysql.service
5. To check that the MySQL server is running, use the following command:
sudo systemctl status mysql
If the server is running, you should see an output similar to the following:
Configuring MySQL
When setting up MySQL for the first time, running the included security script is essential to secure the installation. However, starting in July 2022, running the mysql_secure_installation script may result in an error due to the script’s attempt to set a password for the root MySQL account. On Ubuntu installations, the root MySQL account is not configured to connect using a password by default.
Despite this error, running the security script to improve your MySQL installation’s security is still recommended. To avoid the error, you need to adjust the authentication settings for your root MySQL user.
1. Open the MySQL prompt:
sudo mysql
2. Change the root user’s authentication method to use a password. Run the following command, replacing “password” with a secure password of your choice:
ALTER USER 'root'@'localhost' IDENTIFIED WITH mysql_native_password BY 'password';
3. Exit the MySQL prompt:
exit
4. Run the security script to make further security changes to your MySQL installation:
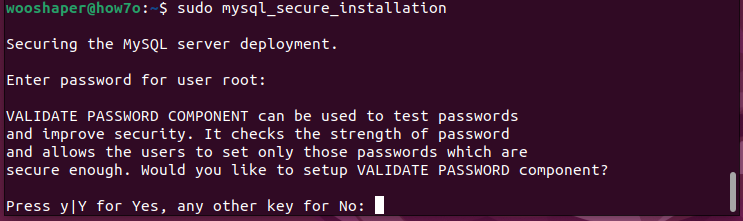
sudo mysql_secure_installation
This script will make changes to your MySQL installation’s security options. The first prompt will ask whether you’d like to set up the Validate Password Plugin. Type Y to set up the plugin or N to skip this step.
You’ll be asked to choose a password policy level to set up the Validate Password Plugin. Enter 2 to select the strongest policy level, which requires passwords to be at least eight characters long and includes a mix of uppercase, lowercase, numeric, and special characters.

Regardless of whether you choose to set up the Validate Password Plugin, the next prompt will be to set a password for the MySQL root user. Enter and then confirm a secure password of your choice.

If you have selected the Validate Password Plugin, you’ll receive feedback on the strength of your new password. Then the script will ask if you want to continue with the password you just entered or if you want to enter a new one. Assuming you’re satisfied with the strength of the password you just entered, enter Y to continue the script.
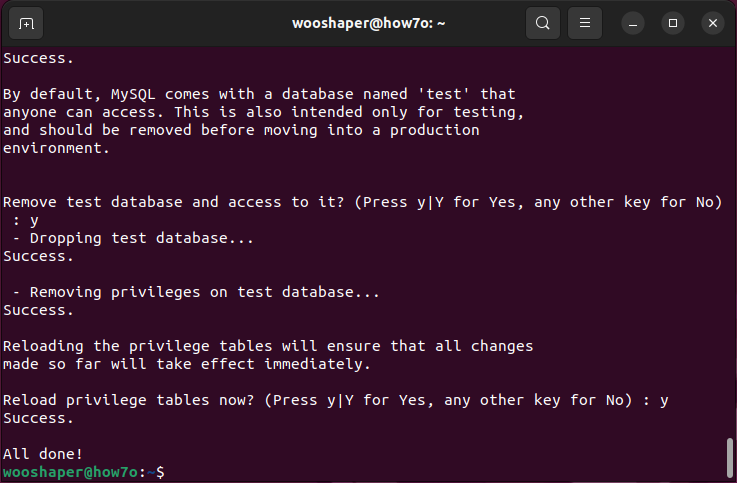
From there, you can press Y and then ENTER to accept the defaults for all the subsequent questions. This will remove some anonymous users and the test database, disable remote root logins, and load these new rules so that MySQL immediately respects your changes.
5. Once the script completes, you can reopen MySQL and change the root user’s authentication method to the default auth_socket. Run the following commands:
sudo mysql -u root -p
6. Change the root user’s authentication method back to auth_socket:
ALTER USER 'root'@'localhost' IDENTIFIED WITH auth_socket;
This step will allow you to connect to MySQL as the root user.
If you want to create a new user and grant privileges in MySQL 8, follow this tutorial that walks you through the process step-by-step.
How to create users and grant privileges in MySQL 8 on Ubuntu?