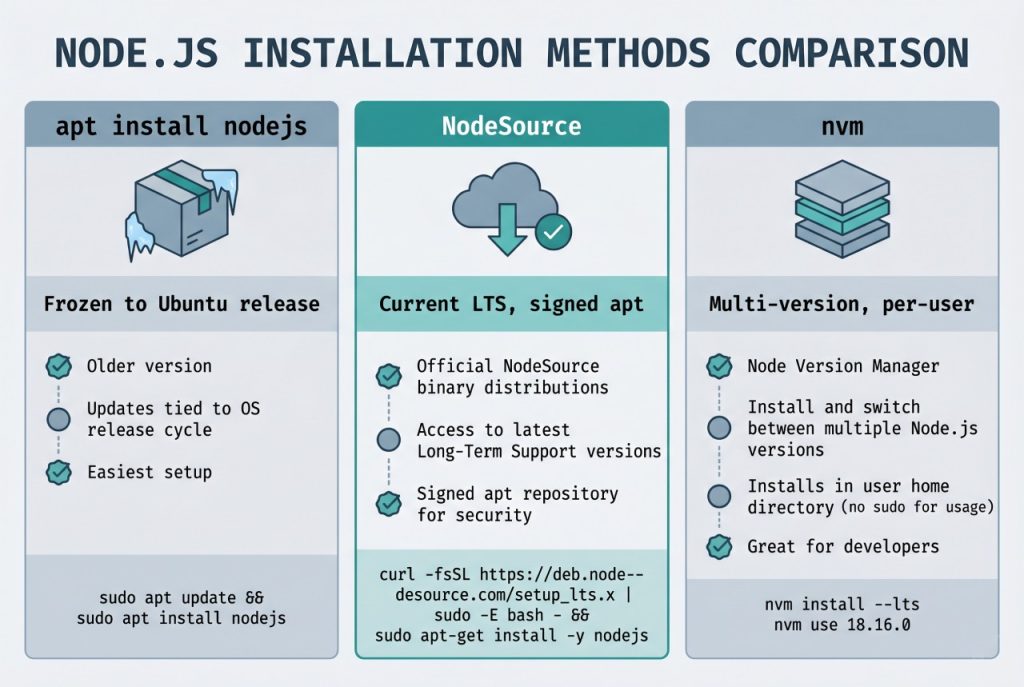
To install Node.js on Ubuntu you have three realistic choices: the stock apt package (fast, but frozen to whatever Node major your Ubuntu release shipped with), the NodeSource apt repository (the right default for most servers — current Node majors with signed apt packages), or nvm (per-user, multi-version, great for developer laptops). This guide walks through all three on Ubuntu 22.04 and 24.04, shows how to pick the right Node.js major for your use case, and covers the pitfalls — stale setup_18.x scripts, npm -g permission errors, conflicting existing installs — that turn a one-minute task into an hour of troubleshooting.
- TL;DR
- Pick the right Node.js version
- Step 1 — Check for an existing Node.js install
- Step 2 — Remove the old install (only if upgrading)
- Step 3 — Install Node.js via NodeSource
- Step 4 — Verify the install
- Step 5 — Alternative: install via nvm (developer laptops)
- Troubleshooting
- “E: Unable to locate package nodejs” after the setup script
- node -v still shows the old version after install
- npm install -g fails with EACCES: permission denied
- “The signing key is not available” on apt update
- node works interactively but not in cron or systemd
- Frequently asked questions
- Related guides
- References
Last verified: 2026-04-16 with Node.js 22 LTS on Ubuntu 24.04 and Ubuntu 22.04. Originally published 2023-02-24, rewritten and updated 2026-04-16.
TL;DR
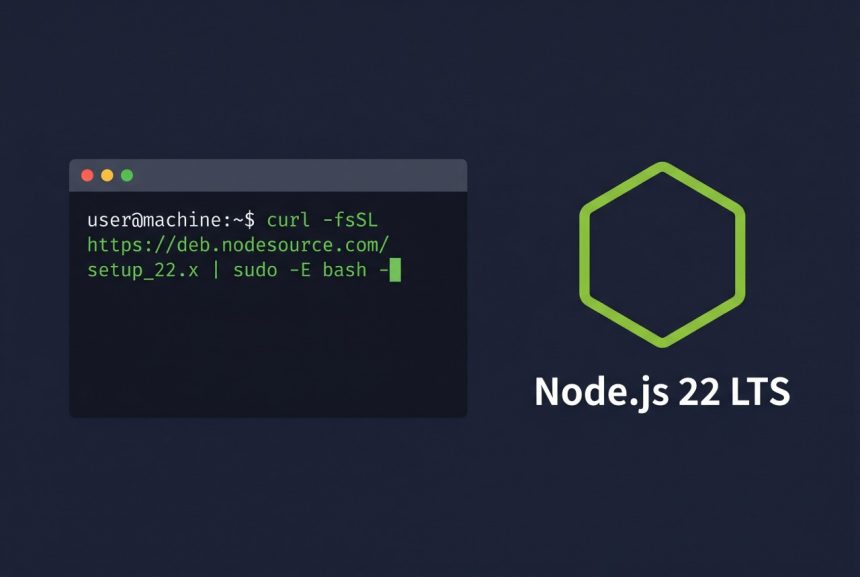
For a production server on Ubuntu, run the NodeSource setup script pinned to an LTS major and install via apt:
curl -fsSL https://deb.nodesource.com/setup_22.x | sudo -E bash -
sudo apt-get install -y nodejs
Verify with node -v and npm -v. For a developer laptop that juggles multiple Node versions, install nvm instead (see Step 5).
Pick the right Node.js version
- LTS (even majors — 20, 22, 24) — 30 months of active + maintenance support. Pick this for anything you don’t want to re-upgrade every six months. Default for servers.
- Current (odd majors — 21, 23, 25) — ships new language features first but loses support in 6 months. Only pick if you need a feature that hasn’t reached LTS.
- Latest LTS at time of writing: Node.js 22 (“Jod”), supported through April 2027. Node 20 is maintenance-only until April 2026. Always check nodejs.org/en/about/previous-releases before pinning.
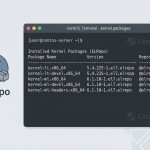
Step 1 — Check for an existing Node.js install
node -v
which node
dpkg -l | grep -E '^ii\s+(nodejs|npm)\s'
If node -v prints a version and it’s what you want, you’re done — skip to Step 4 and verify. If it prints an old version, or if a different source (snap, nvm, a tarball under /opt) owns the binary, clean it up first to avoid two installs fighting over the same command name.
Step 2 — Remove the old install (only if upgrading)
sudo apt remove --purge nodejs npm
sudo apt autoremove
If Node.js was installed via snap, remove that instead: sudo snap remove node. If it’s from nvm, deactivate it with nvm deactivate and optionally nvm uninstall <version>. Mixing package managers on the same node binary is the most common source of “command works in my terminal but not in cron” issues — pick one source and stick to it per machine.
Step 3 — Install Node.js via NodeSource
The NodeSource setup script configures the apt source list and imports the signing key. Replace 22 with whichever LTS major you need — the URL pattern is setup_{MAJOR}.x:
curl -fsSL https://deb.nodesource.com/setup_22.x | sudo -E bash -
sudo apt-get install -y nodejs
Two things to note:
sudo -Epreserves your environment (notablyPATH) so the script can findapt-getand write the keyring into/etc/apt/keyrings/. Plainsudo bash -sometimes doesn’t.- Old how-tos still show
setup_18.xor evensetup_14.x. Both are EOL (Node 14 in April 2023, Node 18 in April 2025). The setup script for an EOL major will print a deprecation warning and refuse to register the repo — don’t copy-paste old commands.
Step 4 — Verify the install
node -v    # should print v22.x.y
npm -v     # ships with nodejs, no separate install needed
which node # /usr/bin/node on NodeSource; /snap/bin/node on snap
Run a one-off script to confirm it actually executes:
node -e "console.log('hello from node ' + process.version)"Step 5 — Alternative: install via nvm (developer laptops)
If you juggle multiple Node majors per project, install nvm instead. It lives entirely under ~/.nvm, needs no sudo, and switches versions with one command:
curl -o- https://raw.githubusercontent.com/nvm-sh/nvm/v0.40.1/install.sh | bash
# restart the shell, or:
source ~/.bashrc

nvm install --lts
nvm use --lts
nvm alias default lts/*
Check the latest nvm tag at github.com/nvm-sh/nvm/releases before pinning — v0.40.1 is current at time of writing. Do not use nvm-managed Node inside systemd services or cron without sourcing nvm.sh first; non-interactive shells don’t read ~/.bashrc.
Troubleshooting
“E: Unable to locate package nodejs” after the setup script
The NodeSource script didn’t successfully register the apt source. Run sudo apt update and read the output — if you see a 404 on deb.nodesource.com, you picked an EOL major (try setup_22.x instead of setup_18.x). If you see GPG error: ... NO_PUBKEY, the keyring step failed; re-run the setup script with sudo -E.
node -v still shows the old version after install
Another node binary is earlier on your PATH. Run which -a node to list all of them. Typical culprits: /snap/bin/node, /usr/local/bin/node (manual tarball install), ~/.nvm/versions/node/.... Remove or reorder the PATH so /usr/bin/node wins, then restart your shell.
npm install -g fails with EACCES: permission denied
Global installs write to /usr/lib/node_modules, owned by root. Either prefix with sudo (fine for trusted packages), or reconfigure npm to use a user-owned prefix:
mkdir ~/.npm-global
npm config set prefix '~/.npm-global'
echo 'export PATH=~/.npm-global/bin:$PATH' >> ~/.bashrc
source ~/.bashrc
“The signing key is not available” on apt update
NodeSource migrated to the modern signed-by keyring layout (/etc/apt/keyrings/nodesource.gpg). If you have a legacy entry in /etc/apt/sources.list.d/nodesource.list pointing at the old apt-key style, remove it (sudo rm /etc/apt/sources.list.d/nodesource.list) and re-run the setup script.
node works interactively but not in cron or systemd
Cron and systemd run non-interactive shells that don’t read ~/.bashrc, so nvm’s PATH export is missing. Either switch that service to the apt-installed Node (absolute path /usr/bin/node), or in the cron entry source nvm first: * * * * * bash -lc 'source ~/.nvm/nvm.sh && node /path/to/script.js'.
Frequently asked questions
Use LTS (even-numbered major: 20, 22, 24 …) for anything you deploy. LTS lines receive 30 months of active + maintenance support. Current (odd-numbered) ships new language features faster but only gets 6 months of support, which means pinning a production app to it is a calendar-driven upgrade treadmill. Install Current only if you specifically need a feature that hasn’t landed in LTS yet.
Ubuntu’s default nodejs package is frozen at whatever version shipped with the release — 18.x on 22.04, 20.x on 24.04 — and never moves within a release. NodeSource publishes signed apt repos for every supported Node.js major (20, 22, 24, …) and keeps them current, so you can run a newer Node on an older Ubuntu without waiting for the next Ubuntu release. Same package name, different origin.
No. Both the Ubuntu nodejs package and the NodeSource nodejs package ship npm bundled in. npm -v should print a version right after installing Node.js. The standalone npm apt package is older and can conflict — don’t install it alongside NodeSource.
If you work on multiple projects that each pin a different Node.js major, use nvm (Node Version Manager) — it installs per-user under ~/.nvm and swaps versions with nvm use 20. For a single project, a single server, or anything running under systemd / a service user, stick with the apt install — it’s simpler, patches with apt upgrade, and doesn’t need shell-profile sourcing for non-interactive contexts like cron and systemd.
The setup script failed silently — usually because curl isn’t installed, or because the script was piped to bash without sudo -E and couldn’t write to /etc/apt/sources.list.d/. Install curl first (sudo apt install curl), re-run the NodeSource command with sudo -E bash -, then sudo apt update before retrying the install.
Because npm install -g tries to write to /usr/lib/node_modules, which is owned by root. Prefix the command with sudo for one-offs, or — cleaner — point npm’s prefix at a user-owned directory: mkdir ~/.npm-global && npm config set prefix '~/.npm-global', then add ~/.npm-global/bin to PATH. Avoids sudo-installing packages that execute arbitrary install scripts.
Related guides
- How to Install PHP on Ubuntu — the other half of most modern web stacks.
- How to Install Composer on Ubuntu — PHP’s package manager, often installed alongside npm.
- WordPress Multisite with Subdirectories on Nginx — Node.js powers the build pipeline (Vite, webpack) for most modern WordPress themes.
References
Official NodeSource installation docs: github.com/nodesource/distributions. Node.js release schedule and EOL dates: nodejs.org/en/about/previous-releases. nvm: github.com/nvm-sh/nvm.