When I first logged into my Ubuntu VPS, the server greeted me with a big text “logo” and a welcome message from my hosting provider. It wasn’t harmful, but it felt unprofessional—especially when I share screenshots with clients or jump between multiple servers daily.
- Quick summary (what you’ll change)
- Step 1: Identify where the message is coming from
- Step 2: Generate an ASCII logo (optional but looks cool)
- Step 3: Change the welcome message on Ubuntu VPS (MOTD)
- Step 4 (optional): Customize the dynamic MOTD (the “proper” way)
- Step 5 (optional): Set an SSH banner (message BEFORE login)
- Step 6: Test everything (without locking yourself out)
- Revert to the original welcome message (if needed)
- Related guides (internal links)
- Final thoughts
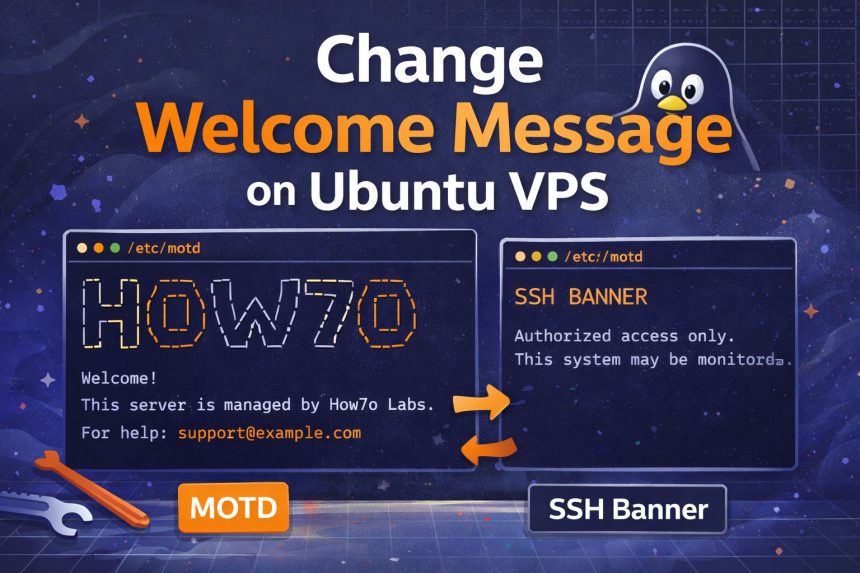
So I decided to change welcome message on Ubuntu VPS to something clean: my own ASCII logo + a short note. Along the way I learned something important: Ubuntu can show two different messages—one before login (SSH banner) and one after login (MOTD). This guide covers both.
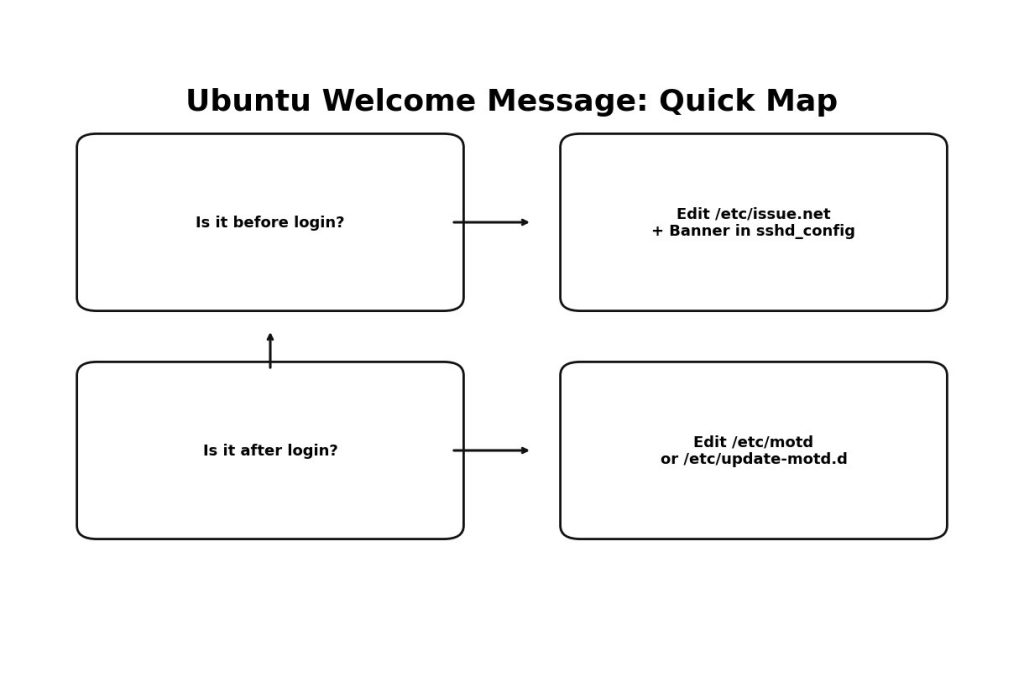
Quick summary (what you’ll change)
- After login welcome message (MOTD): usually
/etc/motdand/or scripts in/etc/update-motd.d/ - Before login SSH banner: typically
/etc/issue.netand theBannersetting in/etc/ssh/sshd_config
Step 1: Identify where the message is coming from
Open a new SSH session to your server and notice when the “provider logo” appears:
- If it appears before you type your password → it’s an SSH banner.
- If it appears after login → it’s your MOTD (Message of the Day).
I had it showing after login, so I started with MOTD first.
Step 2: Generate an ASCII logo (optional but looks cool)
If you want a text logo, the easiest method is using an ASCII text generator. I used this one:
Pick a font, type your name/brand, then copy the generated ASCII art.
Step 3: Change the welcome message on Ubuntu VPS (MOTD)
This is the most common case. The fastest solution is updating /etc/motd. I always back up first so I can revert in 10 seconds.
sudo cp /etc/motd /etc/motd.backup
sudo nano /etc/motd
Now paste your ASCII logo and your message. Example:
_                   _   _____   _   _           _
| |    _____   _____| | |___ /  | | | | ___  ___| |_
| |   / _ \ \ / / _ \ |   |_ \  | |_| |/ _ \/ __| __|
| |__|  __/\ V /  __/ |  ___) | |  _  | (_) \__ \ |_
|_____\___| \_/ \___|_| |____/  |_| |_|\___/|___/\__|


Welcome!

This server is hosted by Level3Host. If you have any questions or need help,
please don't hesitate to contact us at [email protected]
Save and exit, then reconnect via SSH to confirm the new message shows up.
Tip: If your hosting provider message still shows up, you probably have a dynamic MOTD too (Ubuntu often builds extra lines from scripts). Use the next step to control that.
Step 4 (optional): Customize the dynamic MOTD (the “proper” way)
On many Ubuntu VPS servers, MOTD isn’t just one file. Ubuntu can generate extra login text from scripts in /etc/update-motd.d/. That’s why you sometimes see system info, updates count, or cloud/hosting messages after login.
List the scripts:
ls -1 /etc/update-motd.d/If you notice a script clearly added by the provider, you can disable it by removing execute permission (safe and reversible):
sudo chmod -x /etc/update-motd.d/99-provider-messageNow, to add your own dynamic message (that always prints on login), create a custom script like this:
sudo nano /etc/update-motd.d/99-custom-welcomePaste this (edit the text as you like):
#!/bin/sh
cat << 'EOF'
  __  __       _   ____
 |  \/  | ___ | |_|  _ \
 | |\/| |/ _ \| __| | | |
 | |  | | (_) | |_| |_| |
 |_|  |_|\___/ \__|____/

Welcome to my Ubuntu VPS!
EOF
echo "Hostname: $(hostname)"
echo "Uptime: $(uptime -p)"
Make it executable:
sudo chmod +x /etc/update-motd.d/99-custom-welcomeReconnect via SSH and you should see your custom output. This approach is nice because you can also show useful info like uptime, disk usage, or current project notes.
Step 5 (optional): Set an SSH banner (message BEFORE login)
If you want a message to appear before login (often used for security warnings or “Authorized access only”), you can use an SSH banner.
1) Edit /etc/issue.net:
sudo nano /etc/issue.netAdd something like:
Authorized access only.
This system may be monitored.
2) Enable it in SSH config:
sudo nano /etc/ssh/sshd_configFind and set (or add):
Banner /etc/issue.netRestart SSH:
sudo systemctl restart sshStep 6: Test everything (without locking yourself out)
Whenever I change SSH settings, I keep my current SSH session open and test from a second terminal. If something goes wrong, I can revert the config from the first session.
ssh youruser@your-server-ipRevert to the original welcome message (if needed)
If you edited /etc/motd and want the old version back:
sudo cp /etc/motd.backup /etc/motdIf you disabled a script in /etc/update-motd.d/, just re-enable it:
sudo chmod +x /etc/update-motd.d/99-provider-messageRelated guides (internal links)
Final thoughts
Once I understood the difference between SSH banner (before login) and MOTD (after login), it was easy to change welcome message on Ubuntu VPS exactly the way I wanted. For most people, editing /etc/motd is enough. If your server is adding extra provider text, controlling /etc/update-motd.d/ gives you full control.