WireGuard is the modern VPN — about 4,000 lines of kernel code (vs OpenVPN’s 100,000+), faster throughput, simpler config, and in-tree on Linux since kernel 5.6. Below: installing WireGuard on Ubuntu, configuring it as a VPN server, generating client keys, and connecting from both a Linux client and an iPhone. Total setup time: about 25 minutes.
TL;DR
sudo apt install wireguard, generate server keys with wg genkey | tee server.key | wg pubkey > server.pub, write /etc/wireguard/wg0.conf with the server’s private key and an Interface block, generate the same keys for each client and add a [Peer] block per client, enable IP forwarding, set up NAT with iptables-nft, then sudo systemctl enable --now wg-quick@wg0. Connect clients with wg-quick up wg0 on Linux or by scanning a QR code on iOS.
Step 1 — Install WireGuard
sudo apt update
sudo apt install wireguard qrencode
WireGuard itself is in the kernel — the package just installs the userspace tools (wg, wg-quick). qrencode is for generating the iOS client’s QR code later.
Step 2 — Generate the server’s keypair
cd /etc/wireguard
umask 077
wg genkey | tee server.key | wg pubkey > server.pub
cat server.key
cat server.pub
umask 077 ensures the key files are created with 0600 permissions. Keep server.key private; server.pub can be shared.
Step 3 — Write the server config
Create /etc/wireguard/wg0.conf:
[Interface]
PrivateKey = <contents of server.key>
Address    = 10.0.0.1/24
ListenPort = 51820
SaveConfig = false

# NAT for client traffic to the internet via the server's public interface
PostUp   = iptables -t nat -A POSTROUTING -o eth0 -j MASQUERADE; iptables -A FORWARD -i wg0 -j ACCEPT; iptables -A FORWARD -o wg0 -j ACCEPT
PostDown = iptables -t nat -D POSTROUTING -o eth0 -j MASQUERADE; iptables -D FORWARD -i wg0 -j ACCEPT; iptables -D FORWARD -o wg0 -j ACCEPT

# Clients go here — one [Peer] block per device, added below
If your public-facing interface isn’t eth0, change it (find with ip route get 1.1.1.1 — the device after dev is your public interface, often ens3 on cloud VPS).
Step 4 — Enable IP forwarding
echo "net.ipv4.ip_forward = 1" | sudo tee /etc/sysctl.d/99-wireguard.conf
sudo sysctl -p /etc/sysctl.d/99-wireguard.conf
Without forwarding, the server can decrypt client traffic but won’t route it onward to the internet — clients will connect but won’t be able to browse.
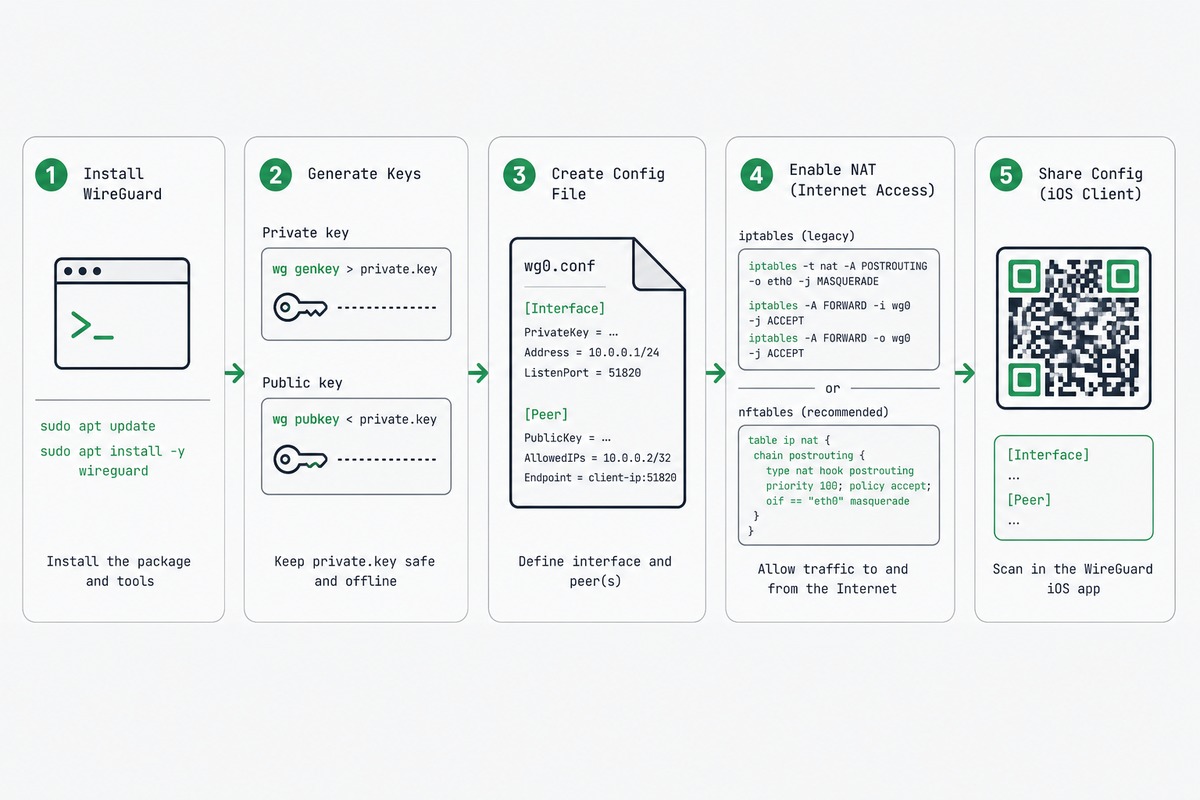
Step 5 — Generate client keys and add a peer
For each client device, generate a keypair (either on the server or the client itself — generating on the server is easier for the initial setup):
cd /etc/wireguard
wg genkey | tee client1.key | wg pubkey > client1.pub
Add a [Peer] block to wg0.conf for this client:
[Peer]
PublicKey  = <contents of client1.pub>
AllowedIPs = 10.0.0.2/32
AllowedIPs here is what the server accepts from this client. The first client gets 10.0.0.2/32, the second 10.0.0.3/32, and so on inside the 10.0.0.0/24 range you defined.
Step 6 — Start the server
sudo systemctl enable --now wg-quick@wg0
sudo systemctl status wg-quick@wg0
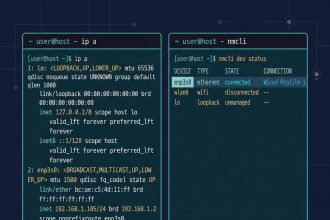
sudo wg showwg show displays the interface state. You should see your server’s public key and a list of configured peers (no handshakes yet — that comes once clients connect).
Open UDP port 51820 in your VPS firewall:
sudo ufw allow 51820/udpStep 7 — Set up a Linux client
On the client machine, create /etc/wireguard/wg0.conf:
[Interface]
PrivateKey = <contents of client1.key>
Address    = 10.0.0.2/24
DNS        = 1.1.1.1

[Peer]
PublicKey  = <contents of server.pub>
Endpoint   = YOUR_SERVER_IP:51820
AllowedIPs = 0.0.0.0/0
PersistentKeepalive = 25
AllowedIPs = 0.0.0.0/0 on the client side means “send all traffic through the VPN” — full tunnel. For a split tunnel (only specific subnets via VPN), narrow it: AllowedIPs = 10.0.0.0/24, 192.168.1.0/24.
sudo wg-quick up wg0
curl ifconfig.me   # should show server's IP
Step 8 — Set up an iOS client (QR code)
iOS WireGuard imports configs by scanning a QR code. Generate one on the server using the same config you’d write to a file:
cat << EOF | qrencode -t ansiutf8
[Interface]
PrivateKey = $(cat /etc/wireguard/client_phone.key)
Address    = 10.0.0.3/24
DNS        = 1.1.1.1

[Peer]
PublicKey  = $(cat /etc/wireguard/server.pub)
Endpoint   = YOUR_SERVER_IP:51820
AllowedIPs = 0.0.0.0/0
PersistentKeepalive = 25
EOF
Install the WireGuard app from the iOS App Store, tap the + button, choose “Create from QR code”, and scan the terminal output. The tunnel is configured and ready to enable.
Troubleshooting
“Tunnel connects but no internet”
Almost always one of: IP forwarding not enabled (cat /proc/sys/net/ipv4/ip_forward should be 1), MASQUERADE rule on wrong interface name, or DNS not set on client (try DNS = 1.1.1.1 in client config).
“Tunnel won’t establish at all”
Firewall blocking UDP 51820, or wrong keys/endpoint in client config. Verify with sudo wg show on the server — connecting client should appear under “latest handshake”. If “latest handshake” stays blank for 30+ seconds, the packet’s not arriving — check VPS firewall + cloud-provider security groups.
“Drops after a few minutes on iOS”
Mobile NAT timeout. Set PersistentKeepalive = 25 in the [Peer] block of the client config — sends a keep-alive every 25 seconds, which keeps the NAT entry alive.
WireGuard for new installs. It’s smaller (4K vs 100K+ lines), faster (kernel-level on Linux, no userspace round-trip), simpler (a single config file instead of cert PKI), and uses modern cryptography (Curve25519, ChaCha20, BLAKE2). OpenVPN is still excellent and has a 20-year track record, but for everything except very narrow legacy compatibility needs, WireGuard is the right answer.
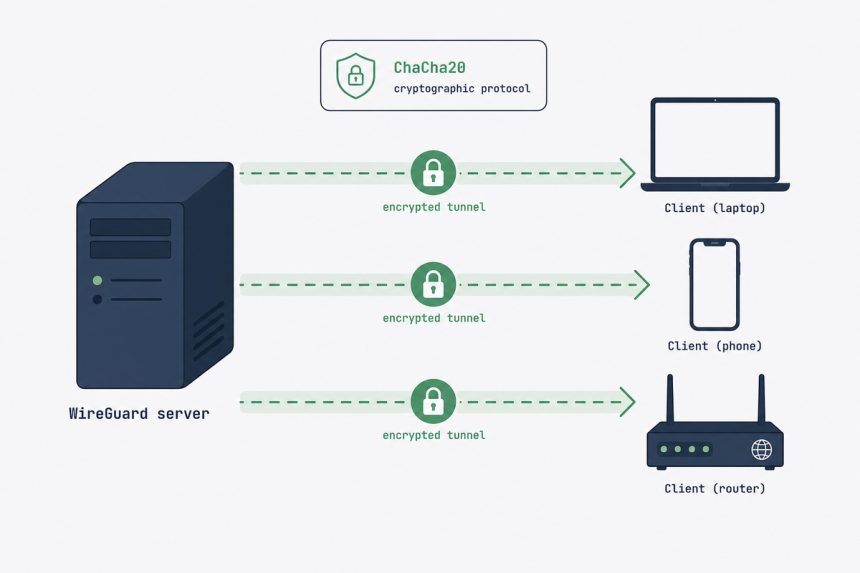
Yes — that’s one of WireGuard’s main use cases. The tunnel encrypts every byte between your device and your VPN server, so the hotel can see encrypted UDP packets to your server IP and nothing else. Make sure the client config uses AllowedIPs = 0.0.0.0/0 (full tunnel) — otherwise some traffic still goes direct.
A static IP is convenient but not required. If your VPS IP changes occasionally, use a DDNS hostname (e.g. myhost.duckdns.org) in the client’s Endpoint = line instead of an IP. The client re-resolves the DNS name on connection.
Many more than most people need. WireGuard’s overhead per peer is tiny; a single VPS with 1 GB RAM can comfortably handle 50-100 active clients. The bandwidth ceiling is usually the VPS’s network throughput, not WireGuard itself.
Yes. WireGuard is a network interface, not a service that competes with web servers — it doesn’t bind to any port that conflicts with HTTP/HTTPS. The only thing to watch is firewall rules — make sure your web app’s ports are still open via the regular interface.
WireGuard itself logs almost nothing by default — just kernel-level interface events. No connection logs, no traffic logs, no metadata about what clients did. Add logfile or external monitoring (Prometheus exporter) if you want metrics; for privacy-first VPN use, the default minimal logging is the point.
Related guides
- Set up Tailscale on Ubuntu — the managed alternative when you want zero-config mesh networking.
- SSH key authentication on Ubuntu — secure the VPS that’s hosting WireGuard.
- Harden an Ubuntu VPS — the broader security posture WireGuard fits into.
- Install fail2ban on Ubuntu — protects the rest of the services running alongside WireGuard.
The official WireGuard documentation and protocol specification live at wireguard.com.