To enable CageFS for a user on CloudLinux, run cagefsctl --enable <username> on the server, or use the CloudLinux Manager toggle in WHM. CageFS is CloudLinux’s per-user filesystem cage — once enabled, the user can only see their own files and a sanitized view of the system, which blocks symlink attacks and is the main reason shared hosting on CloudLinux is safer than vanilla cPanel.
Last verified: 2026-05-17 on CloudLinux 9 with cPanel/WHM 11.118+. Originally published 2023-03-22, rewritten and updated 2026-05-17.
TL;DR
# Enable CageFS for a single user
/usr/sbin/cagefsctl --enable username

# Enable for every user on the server
/usr/sbin/cagefsctl --enable-all

# Disable for one user (rarely needed)
/usr/sbin/cagefsctl --disable username

# See who's in and who's out
/usr/sbin/cagefsctl --enabled-users
/usr/sbin/cagefsctl --disabled-users
Enable from the command line
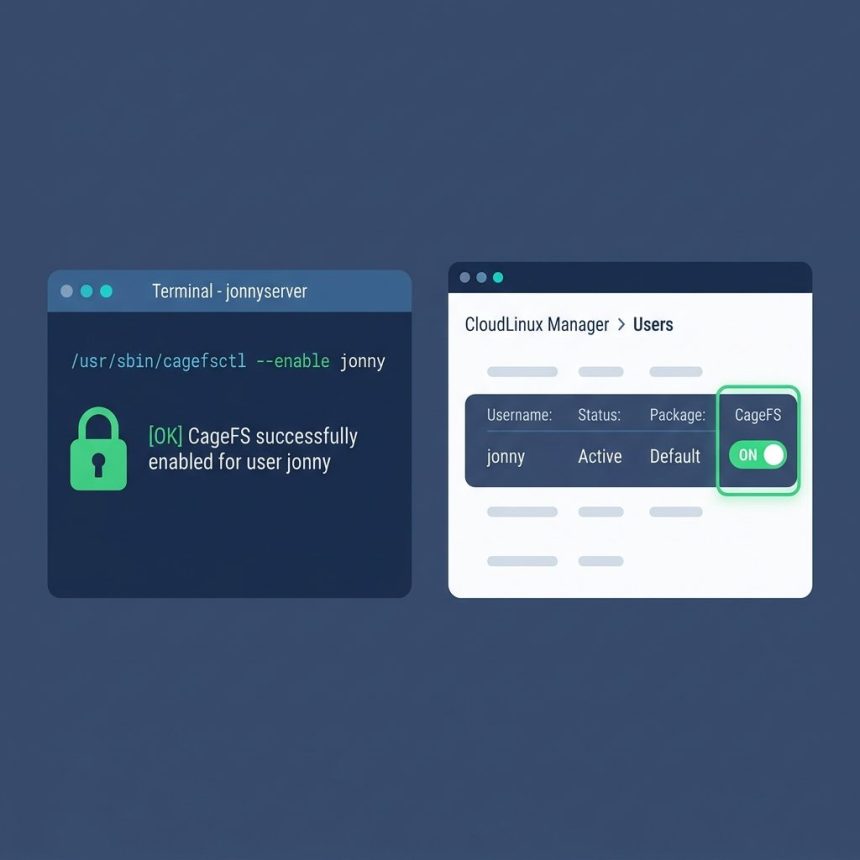
SSH into the server as root, then enable CageFS for a specific username:
/usr/sbin/cagefsctl --enable usernameTo enable CageFS for every user at once (typical for a new server, or after a CageFS install):
/usr/sbin/cagefsctl --enable-allBoth commands return immediately and don’t require restarting Apache or PHP-FPM — the change takes effect on the user’s next request.
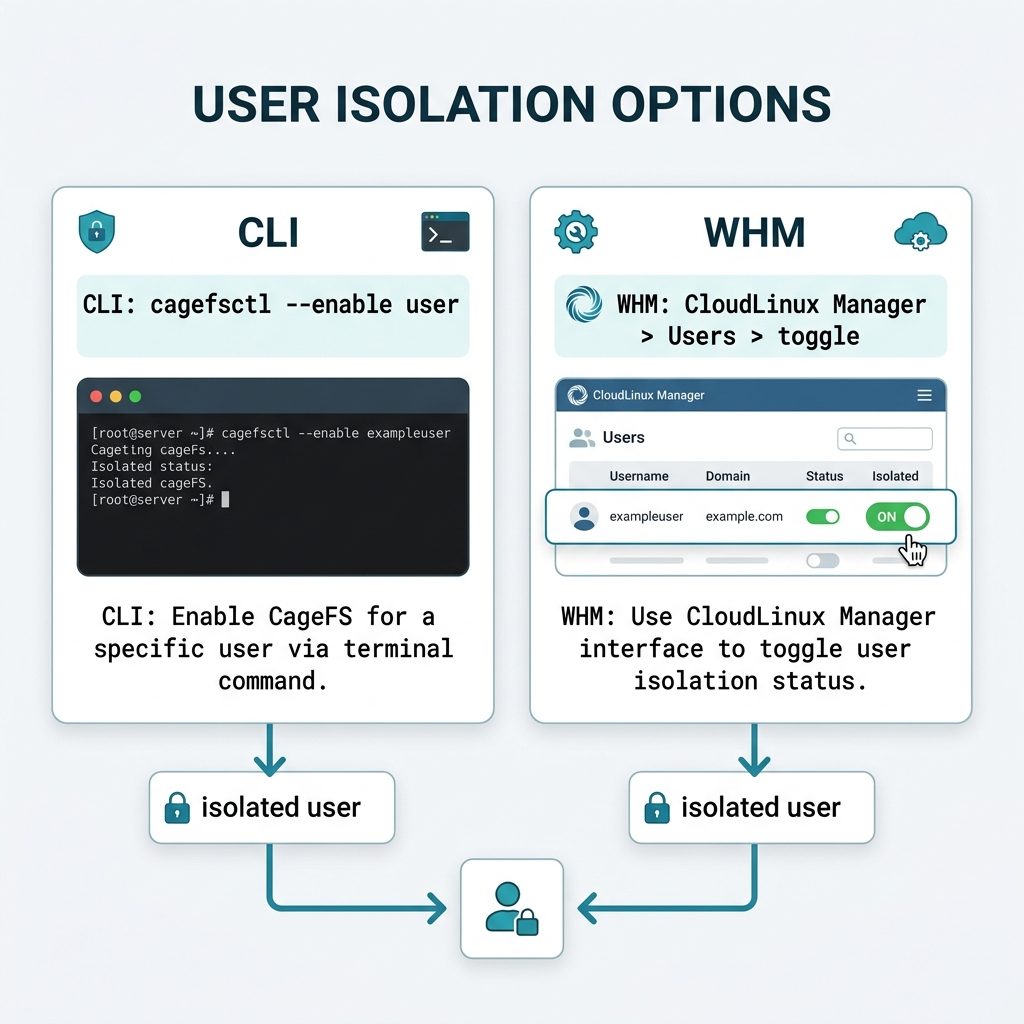
Enable from WHM
- Log into WHM as root.
- Open CloudLinux Manager.
- Click the Users tab.
- Find the username; flip the CageFS toggle to on.
The toggle calls the same cagefsctl --enable on the backend. Use the CLI for scripting (bulk operations, automation); use the WHM UI for one-off changes.
Verify
# Status for a specific user
/usr/sbin/cagefsctl --user-status username

# List everyone currently enabled
/usr/sbin/cagefsctl --enabled-users

# List everyone outside the cage
/usr/sbin/cagefsctl --disabled-users
Disable (rarely)
/usr/sbin/cagefsctl --disable usernameDisabling removes the isolation, which is the whole reason CageFS exists. Only disable as a diagnostic step when troubleshooting an application that doesn’t play well with the cage, and re-enable after solving the root cause.
Frequently asked questions
CageFS is CloudLinux’s per-user filesystem virtualization. Each user gets their own jailed view of the filesystem — they see only their own files, a limited set of system binaries, and isolated /tmp, /proc, and devices. This blocks symlink attacks, prevents one user from reading another user’s PHP source, and is one of the main reasons shared hosting can be relatively safe.
Two common reasons: (1) the account was created before CageFS was installed on the server — CageFS wraps existing users only when explicitly enabled, and (2) certain CloudLinux features (LVE selection by hostname, some legacy compatibility modes) leave users outside the cage. The fix is the same: run cagefsctl --enable <user> or use the WHM toggle.
/usr/sbin/cagefsctl --enabled-users lists every user currently in the cage. /usr/sbin/cagefsctl --disabled-users lists those outside. To check one specific user: cagefsctl --user-status <username> returns Enabled or Disabled.
Usually no — CageFS is designed to be transparent to PHP applications. The most common breakage is when a script depends on a system binary that isn’t in the cage’s allowed-binaries list. The fix is to add that binary via cagefsctl --addrpm <pkg> or to copy the file into /etc/cagefs/conf.d/. Most stock LAMP applications (WordPress, Laravel, generic PHP) need no changes.
/usr/sbin/cagefsctl --disable <username>. Use sparingly — disabling the cage removes the isolation, which is the main reason to be on CloudLinux at all. If you need to disable it to fix a specific incompatibility, do that as a diagnostic step then re-enable after solving the root cause.
Related guides
References
CloudLinux CageFS reference: docs.cloudlinux.com/cloudlinux_os_components/cagefs.html. cagefsctl CLI options: docs.cloudlinux.com — cagefsctl options.