If you want to install MySQL on Ubuntu the right way, this guide walks through every step I run on a fresh Ubuntu 22.04 server: installing the mysql-server package from apt, enabling the service, securing it with mysql_secure_installation, and choosing between the default auth_socket plugin and mysql_native_password for the root account. By the end you will have MySQL 8.0 running, hardened, and ready to host a database for a web application.
- TL;DR
- Prerequisites
- Installing MySQL on Ubuntu
- 1. Refresh the package index
- 2. Install the mysql-server package
- 3. Enable MySQL to start on boot
- 4. Start the MySQL service
- 5. Confirm the service is running
- Securing MySQL with mysql_secure_installation
- 1. Open the MySQL prompt as root
- 2. Set a temporary password on root
- 3. Exit the MySQL shell
- 4. Run the security script
- Switching root back to auth_socket
- Verifying MySQL is installed correctly
- Troubleshooting
- mysql_secure_installation errors on the password step
- systemctl status mysql shows “active (exited)” or “failed”
- “Access denied for user ‘root’@’localhost'” after switching to auth_socket
- Frequently asked questions
- Related guides
- References
Last verified: 2026-04-16 on Ubuntu 22.04 LTS with the default MySQL 8.0 packages. Originally published 2023-03-01, rewritten and updated 2026-04-16.
TL;DR
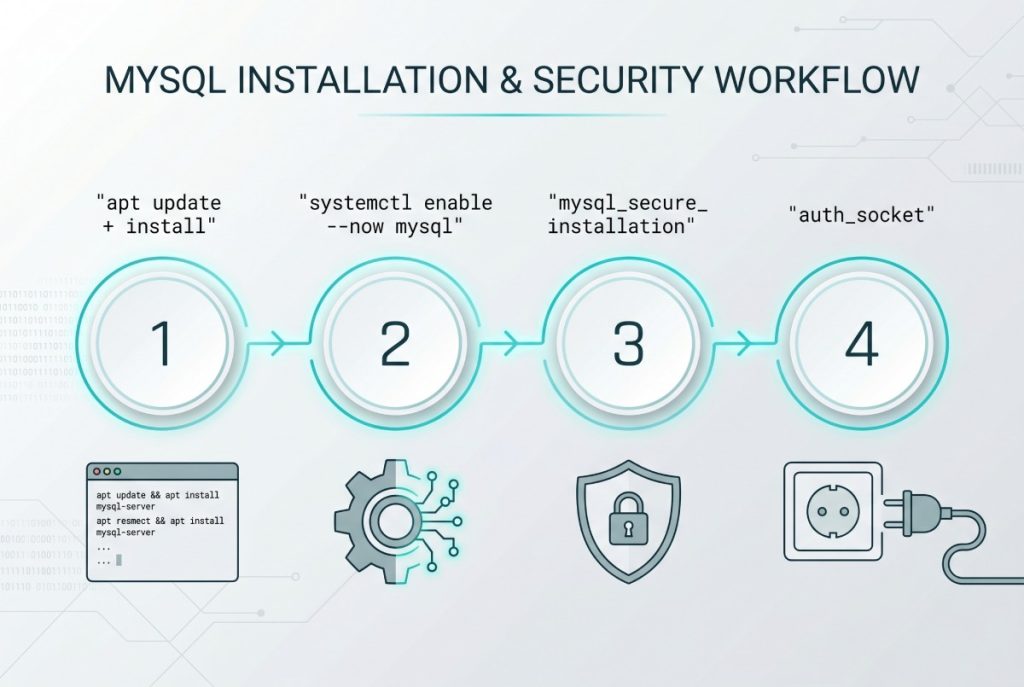
Run sudo apt update && sudo apt install mysql-server, enable the service with sudo systemctl enable --now mysql, then harden the install with sudo mysql_secure_installation. On Ubuntu, the root account authenticates over a local socket by default — if the security script errors on the password step, set a temporary mysql_native_password, finish the script, then switch root back to auth_socket.
Prerequisites
- An Ubuntu 22.04 server (a fresh 20.04 install works too; package names are identical).
- A non-root user with
sudoprivileges. - Outbound access to
archive.ubuntu.comso apt can fetch the MySQL packages.
Installing MySQL on Ubuntu
1. Refresh the package index
Before installing anything, pull the latest package list so apt knows about the current MySQL version in the Ubuntu repositories:
sudo apt update2. Install the mysql-server package
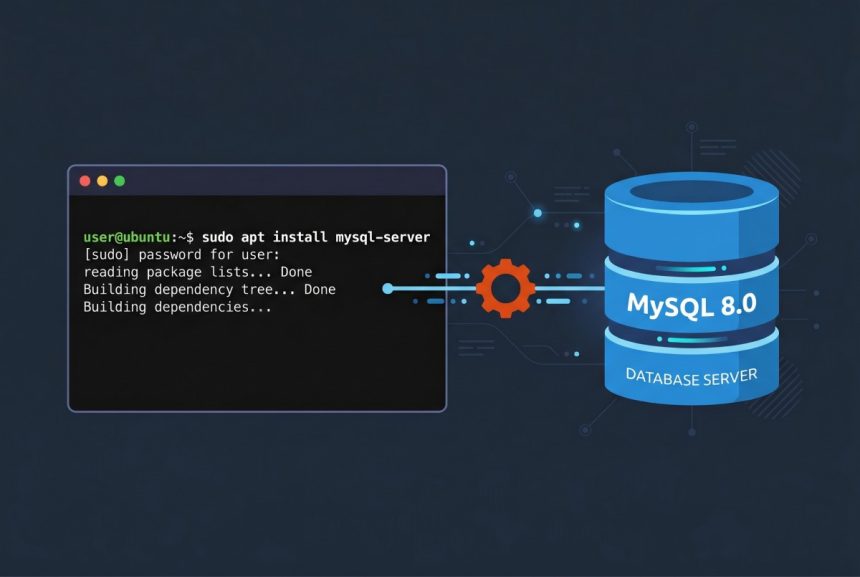
The mysql-server meta-package pulls in the MySQL 8.0 server, the client tools, and the systemd unit file in one step:
sudo apt install mysql-serverApt will list the dependencies it intends to pull in (mysql-client, mysql-common, and a handful of libs). Press Y to confirm.
3. Enable MySQL to start on boot
On a server you almost always want MySQL to come back up after a reboot. Enable the systemd unit:
sudo systemctl enable mysql4. Start the MySQL service
The apt install typically starts MySQL for you, but start it explicitly if it’s not already running:
sudo systemctl start mysqlBoth mysql and mysql.service resolve to the same unit, so either of these is fine:
sudo systemctl start mysql.service5. Confirm the service is running
sudo systemctl status mysqlYou’re looking for Active: active (running) near the top of the output. If you see failed or inactive (dead), skip to the Troubleshooting section below before going further.
Securing MySQL with mysql_secure_installation
MySQL ships with a helper script that locks down the defaults: removing anonymous users, disabling remote root login, dropping the test database, and optionally enabling the Validate Password plugin. Starting in July 2022 the script can error on Ubuntu because it tries to set a password on the root account — and on Ubuntu the root account is configured to authenticate over a local Unix socket, not a password, by default.
The fix is to temporarily switch root to password authentication, run the script, then switch back.
1. Open the MySQL prompt as root
sudo mysql2. Set a temporary password on root
Replace password with a strong value of your choice:
ALTER USER 'root'@'localhost' IDENTIFIED WITH mysql_native_password BY 'password';3. Exit the MySQL shell
exit4. Run the security script
sudo mysql_secure_installationThe first prompt asks whether to set up the Validate Password plugin. Type Y to enable it or N to skip. If you enable it you’ll be asked to pick a policy level — enter 2 for the strongest tier, which requires at least eight characters and a mix of uppercase, lowercase, digits, and special characters.
Next the script asks for the root password. Enter a strong one and confirm it. With the Validate Password plugin enabled you’ll see feedback on the password’s estimated strength; press Y to accept and continue.
For every subsequent question — remove anonymous users, disallow remote root login, remove the test database, reload privilege tables — press Y and then Enter. These defaults are safe for production servers.
Switching root back to auth_socket
Now that the security script has finished, put root back on the default Ubuntu authentication plugin so day-to-day administration uses sudo mysql rather than a password.
sudo mysql -u root -pThen, at the MySQL prompt:
ALTER USER 'root'@'localhost' IDENTIFIED WITH auth_socket;After this change, mysql -u root -p will stop working — which is intentional. Use sudo mysql from here on; the Unix socket binds the MySQL root account to your Linux sudo account. Create a separate password-authenticated user for your application rather than reusing root.
Verifying MySQL is installed correctly
A quick sanity check that the server is listening and the client works end-to-end:
sudo mysql -e "SELECT VERSION();"You should see the installed version — something like 8.0.x-0ubuntu0.22.04.x. If that query returns a version string, the server is up, the socket is connectable, and your sudo user has the expected root mapping.
Troubleshooting
mysql_secure_installation errors on the password step
This is the exact case covered above: on a fresh Ubuntu install the root account uses auth_socket, not a password, so the script’s attempt to set or verify a root password fails. Run the ALTER USER … mysql_native_password statement first, then re-run mysql_secure_installation.
systemctl status mysql shows “active (exited)” or “failed”
Check the journal for the actual reason the unit is not running:
sudo journalctl -u mysql --no-pager | tail -n 50Common causes on a fresh install are disk-full conditions in /var/lib/mysql and permission problems after a manual copy of the data directory. Fix the underlying issue, then sudo systemctl restart mysql.
“Access denied for user ‘root’@’localhost'” after switching to auth_socket
This is expected when you try to log in as mysql -u root -p after the switch. Use sudo mysql instead — the socket plugin matches your Linux user, not a password.
Frequently asked questions
apt install mysql-server install on Ubuntu 22.04? The default Ubuntu 22.04 repositories ship MySQL 8.0. If you need a different major version (5.7 or a newer 8.x point release), add the official MySQL APT repository from dev.mysql.com before installing.
auth_socket or mysql_native_password for the root user? On a server you administer with sudo, leave root on auth_socket — it’s more secure because there’s no password that can be leaked or brute-forced, and it keeps MySQL admin gated behind your Linux sudo rights. Create a separate password-authenticated user for your application.
No. The mysql-server meta-package on Ubuntu pulls in mysql-client as a dependency, so the mysql shell is already on your PATH after the install completes.
Run sudo apt purge mysql-server mysql-client mysql-common followed by sudo apt autoremove. If you want to delete the data directory as well, remove /var/lib/mysql and /etc/mysql after purging.
Because this guide switches root back to auth_socket after running mysql_secure_installation. That’s the recommended Ubuntu default. Use sudo mysql instead of mysql -u root -p.
Related guides
References
Official MySQL 8.0 reference manual: dev.mysql.com/doc/refman/8.0/en/. Ubuntu server documentation for MySQL: ubuntu.com/server/docs/databases-mysql.