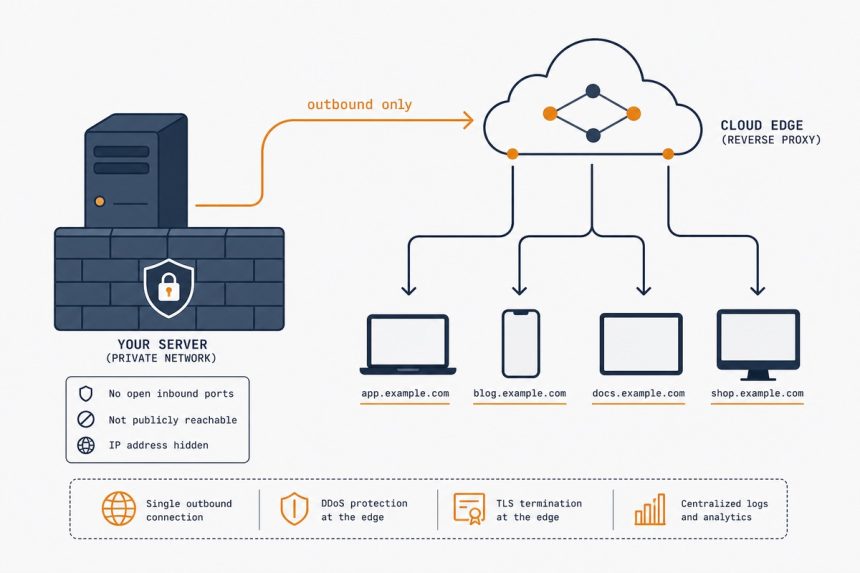
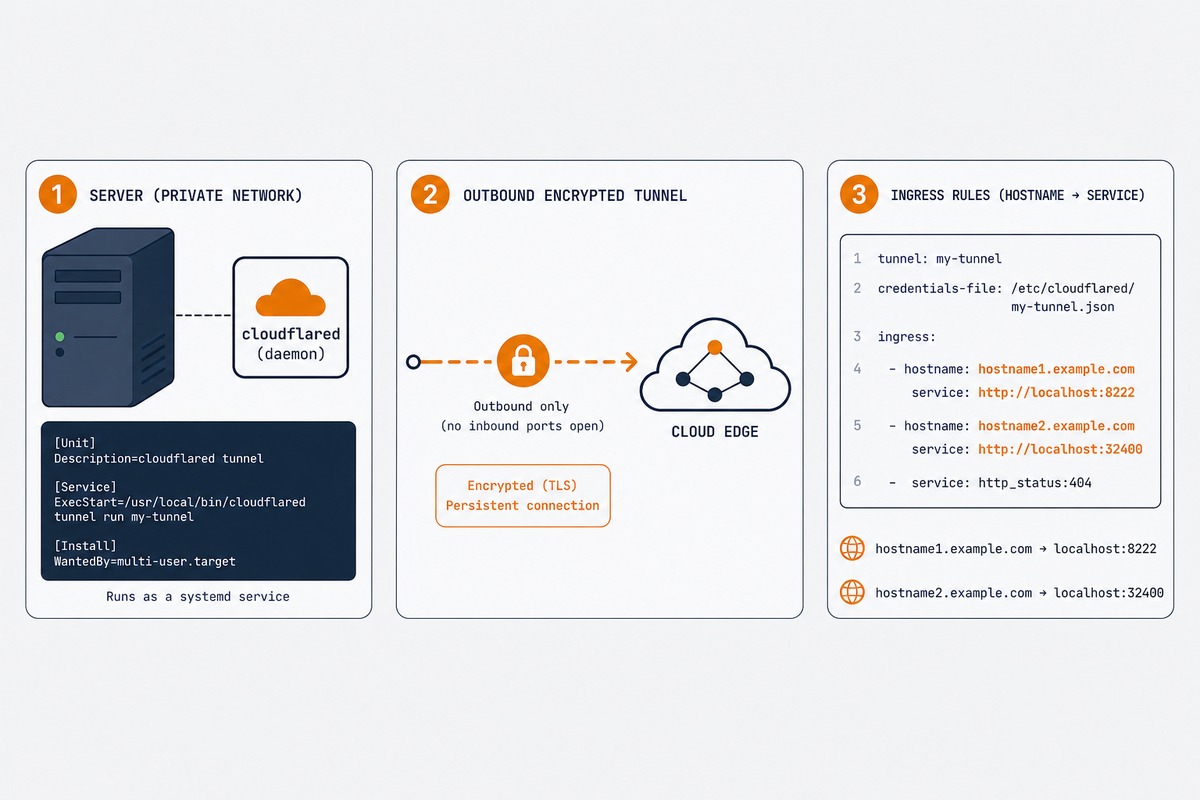
Cloudflare Tunnel creates an outbound-only encrypted connection from your server to Cloudflare’s edge — no inbound port forwards, no public IP needed on your side, no DDNS needed. It’s how you expose a home Plex server, a self-hosted Vaultwarden, or a development environment to the internet without touching your router. Free for personal use. Below: installing cloudflared on Ubuntu, creating a named tunnel, and routing multiple hostnames into local services.
- TL;DR
- Prerequisites
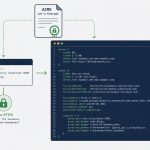
- Step 1 — Install cloudflared
- Step 2 — Authenticate with your Cloudflare account
- Step 3 — Create a named tunnel
- Step 4 — Route a DNS hostname to the tunnel
- Step 5 — Write the ingress config
- Step 6 — Install as a systemd service
- Access policies (lock down who can reach the tunnel)
- Troubleshooting
- “Tunnel connects but hostname returns 502”
- “Cloudflare returns ‘Tunnel disconnected'”
- “Updates to config.yml don’t take effect”
- Related guides
TL;DR
Install cloudflared from Cloudflare’s apt repo, run cloudflared login (opens a browser to authorise), create a named tunnel with cloudflared tunnel create my-tunnel, add a DNS route in the Cloudflare dashboard (or via cloudflared tunnel route dns), write an ingress config in /etc/cloudflared/config.yml that maps hostnames to local services, and install as a systemd service. Total setup: 15 minutes.
Prerequisites
- A domain on Cloudflare (the free plan is fine). DNS must be managed by Cloudflare for the domain you want to use.
- An Ubuntu server (22.04, 24.04, 26.04) with the services you want to expose running on it (or reachable from it).
- Outbound HTTPS (port 443) to Cloudflare’s edge — almost always available, but tunnels behind extremely restrictive firewalls may need
cloudflaredin “QUIC mode” instead.
Step 1 — Install cloudflared
# Add Cloudflare's gpg key and apt repo
sudo mkdir -p --mode=0755 /usr/share/keyrings
curl -fsSL https://pkg.cloudflare.com/cloudflare-main.gpg | sudo tee /usr/share/keyrings/cloudflare-main.gpg > /dev/null
echo "deb [signed-by=/usr/share/keyrings/cloudflare-main.gpg] https://pkg.cloudflare.com/cloudflared $(lsb_release -cs) main" | sudo tee /etc/apt/sources.list.d/cloudflared.list
sudo apt update
sudo apt install cloudflared
Confirm:
cloudflared --versionStep 2 — Authenticate with your Cloudflare account
cloudflared tunnel loginThis prints a URL. Open it in any browser, log into Cloudflare, and pick the domain you want to use. Cloudflare drops a certificate (cert.pem) into ~/.cloudflared/ — that’s your delegation to create tunnels for this account.
If you’re on a headless server, run the login locally first, then scp the cert.pem to the server’s ~/.cloudflared/.
Step 3 — Create a named tunnel
cloudflared tunnel create myhomeserverOutput:
Tunnel credentials written to /root/.cloudflared/abc123-def456-….json
Created tunnel myhomeserver with id abc123-def456-…
That JSON file is the tunnel’s credentials — keep it private; it grants control of the tunnel. Note the tunnel ID; you’ll use it in the config file.
Step 4 — Route a DNS hostname to the tunnel
cloudflared tunnel route dns myhomeserver vault.example.comThis adds a CNAME record in Cloudflare’s DNS pointing vault.example.com at <tunnel-id>.cfargotunnel.com. Cloudflare’s edge sees requests on that hostname and routes them through your tunnel to the server.
Step 5 — Write the ingress config
Create /etc/cloudflared/config.yml:
tunnel: abc123-def456-…
credentials-file: /root/.cloudflared/abc123-def456-….json

ingress:
  - hostname: vault.example.com
    service: http://localhost:8222

  - hostname: plex.example.com
    service: http://localhost:32400

  - hostname: status.example.com
    service: http://localhost:3000
    originRequest:
      noTLSVerify: true

  # Catch-all 404 for unknown hostnames
  - service: http_status:404
Each rule maps a hostname (the ones you DNS-routed) to a local URL. The catch-all http_status:404 rule must be last — without it, cloudflared refuses to start because it requires every config to have a final catch-all.
To add a new exposed service later: route the DNS, add an ingress rule, restart cloudflared. No port forwarding needed for any of them.
Step 6 — Install as a systemd service
sudo cloudflared service install
sudo systemctl enable --now cloudflared
sudo systemctl status cloudflared
The tunnel is now persistent across reboots. Test by visiting your hostname — within seconds of starting, requests to vault.example.com route through Cloudflare → your tunnel → localhost:8222 on the server.
Access policies (lock down who can reach the tunnel)
For services that aren’t meant to be world-readable (admin dashboards, family-only Plex, etc.), add Cloudflare Access policies. In the Cloudflare dashboard: Zero Trust → Access → Applications → Add an application → Self-hosted → select your hostname → policy “Allow” → identity provider (email OTP is the simplest, Google/GitHub/etc. work too).
Now Cloudflare prompts for authentication before forwarding any request to your tunnel. Even if someone discovers the hostname, they can’t reach the service without authenticating.
Troubleshooting
“Tunnel connects but hostname returns 502”
The local service isn’t reachable from cloudflared. Verify with curl http://localhost:8222 on the same server — if that fails, the service isn’t running where you think it is. Also check that the service binds to localhost or 0.0.0.0, not a Docker-internal IP that cloudflared can’t see.
“Cloudflare returns ‘Tunnel disconnected'”
cloudflared isn’t running, or its outbound connection is blocked. sudo systemctl status cloudflared and check the journalctl logs. If a firewall is dropping outbound 443/UDP, switch cloudflared to TCP mode by passing --protocol http2 in the service config.
“Updates to config.yml don’t take effect”
cloudflared needs a restart after config changes: sudo systemctl restart cloudflared. There’s no SIGHUP-style reload — full restart is the supported flow.
Three reasons: (1) you don’t need a public IP — works behind CGNAT, hotel Wi-Fi, mobile hotspots; (2) you don’t expose any inbound port, which removes an entire class of brute-force and reconnaissance attacks; (3) Cloudflare’s DDoS protection and WAF sit in front of your service for free. Trade-off: traffic flows through Cloudflare, so latency adds 10–50ms depending on your region.
Yes for personal use, unmetered bandwidth. The free tier includes unlimited tunnels and Cloudflare Access for up to 50 users. Cloudflare One (the paid product) adds enterprise features like service tokens, advanced policies, and Zero Trust posture checks — none of which you need for self-hosting personal services.
No — if the Cloudflare edge is down, your tunnel is down for that period. Cloudflare’s uptime is excellent (typically four-nines) but it’s not zero. For services that genuinely need to never go down, you’d either run a separate fallback (e.g., a low-cost VPS with a normal public IP) or skip Cloudflare Tunnel and use direct port-forward + dynamic DNS.
Yes, via ssh:// service type in the ingress config. Connecting clients need to run cloudflared access ssh locally to establish the tunneled SSH connection — which is an extra step but means SSH is no longer exposed to the public internet at all. Excellent for high-security use cases.
Different problems. Cloudflare Tunnel exposes services to the public internet (or to authenticated users via Access) through Cloudflare’s edge. Tailscale creates a private mesh network where only authenticated devices can reach each other. Use Tunnel when you want the service publicly reachable; use Tailscale when you only want your own devices to reach it.
Cloudflare terminates TLS at the edge, so they see decrypted HTTP/HTTPS metadata and request bodies pass through. For most self-hosting use cases, this is acceptable (it’s the same trust model as using Cloudflare for any website). For genuinely private services, run them through Tailscale or WireGuard instead — those keep traffic end-to-end encrypted between your devices.
Related guides
- Set up WireGuard VPN on Ubuntu — the alternative when you want a self-hosted tunnel instead of Cloudflare’s edge.
- Install Tailscale on Ubuntu — the private-mesh alternative for service-to-service connections.
- Let’s Encrypt with Certbot — for the public-facing services Cloudflare Tunnel doesn’t handle.
- nginx reverse proxy — the layer that often sits behind the tunnel.
Cloudflare’s official Tunnel documentation is at developers.cloudflare.com.