I needed to upgrade the Linux kernel on a CentOS 7 server to patch a security vulnerability and pick up newer hardware support. If you’re running CentOS 7 and need a newer kernel than what the default repos provide, this guide walks you through the full process — from checking your current version to setting the new kernel as the default boot option in GRUB.
- TL;DR
- Step 1: Check Your Current Kernel Version
- Step 2: Update CentOS Repositories
- Step 3: Enable the ELRepo Repository
- Step 4: List Available Kernels
- Step 5: Install the New Kernel
- Step 6: Reboot and Select the New Kernel
- Step 7: Set the New Kernel as the Default Boot Option
- Troubleshooting
- New Kernel Does Not Appear in GRUB Menu
- System Boots Into the Old Kernel
- ELRepo RPM Installation Fails
- Frequently Asked Questions
- Related Guides
Originally published March 16, 2023, rewritten and updated April 16, 2026.
⚠️ CentOS 7 reached end of life on June 30, 2024. This means no further security patches or updates from the CentOS project. If you are still running CentOS 7 in production, consider migrating to AlmaLinux, Rocky Linux, or another RHEL-compatible distribution. The steps below remain accurate for existing CentOS 7 systems, but the ELRepo repository may eventually stop providing new kernel builds for CentOS 7.
TL;DR
Import the ELRepo GPG key, install the ELRepo repository, then use yum to install either kernel-ml (mainline) or kernel-lt (long-term support). After installation, reboot, select the new kernel from the GRUB menu, and set GRUB_DEFAULT=0 in /etc/default/grub so it boots by default. Regenerate the GRUB config with grub2-mkconfig and reboot once more to confirm.
Step 1: Check Your Current Kernel Version
Before upgrading the Linux kernel, check which version is currently running. This gives you a baseline to verify the upgrade succeeded later.
uname -msrYou will see output like Linux 3.10.0-1160.el7.x86_64 x86_64 — the default CentOS 7 kernel is in the 3.10.x series. Note this version so you can compare after the upgrade.
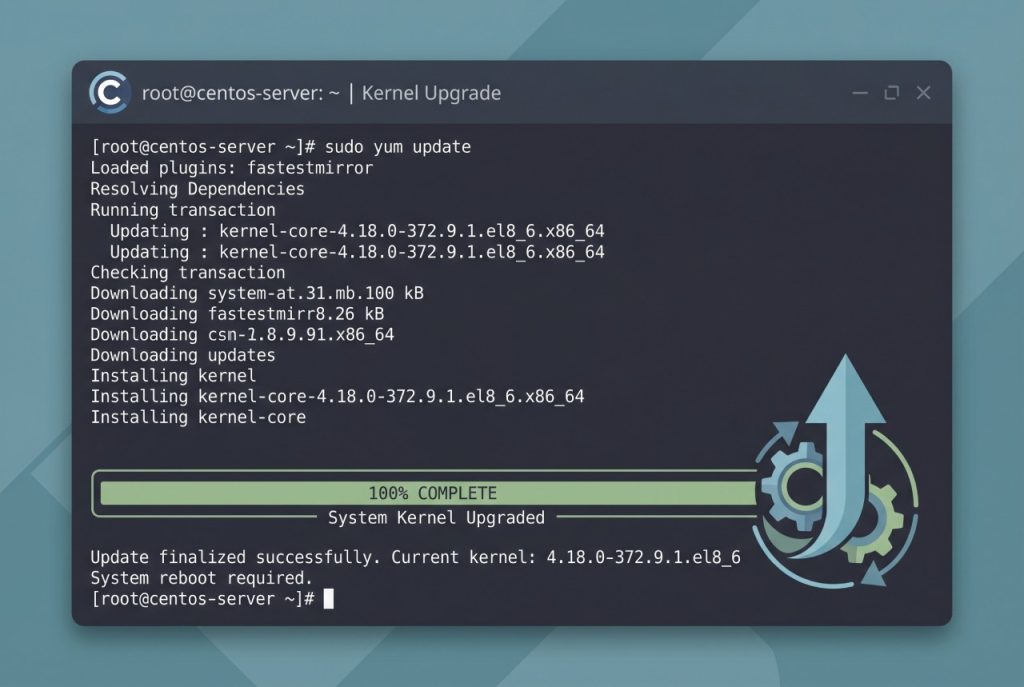
Step 2: Update CentOS Repositories
Update your existing packages and repository metadata before adding new repos. This ensures there are no dependency conflicts during the kernel installation.
sudo yum -y updateThe -y flag automatically confirms all prompts. Depending on how many packages need updating, this may take a few minutes.
Step 3: Enable the ELRepo Repository
The default CentOS repositories do not carry newer kernel versions. ELRepo is a community repository that provides kernel packages built specifically for RHEL/CentOS.
Import the GPG Key
CentOS requires packages to be signed. Import the ELRepo GPG key first:
sudo rpm --import https://www.elrepo.org/RPM-GPG-KEY-elrepo.orgInstall the ELRepo Repository Package
Install the repository configuration RPM:
sudo rpm -Uvh https://www.elrepo.org/elrepo-release-7.0-3.el7.elrepo.noarch.rpmThis adds the ELRepo repository to your yum configuration. You can verify it was added by checking /etc/yum.repos.d/elrepo.repo.
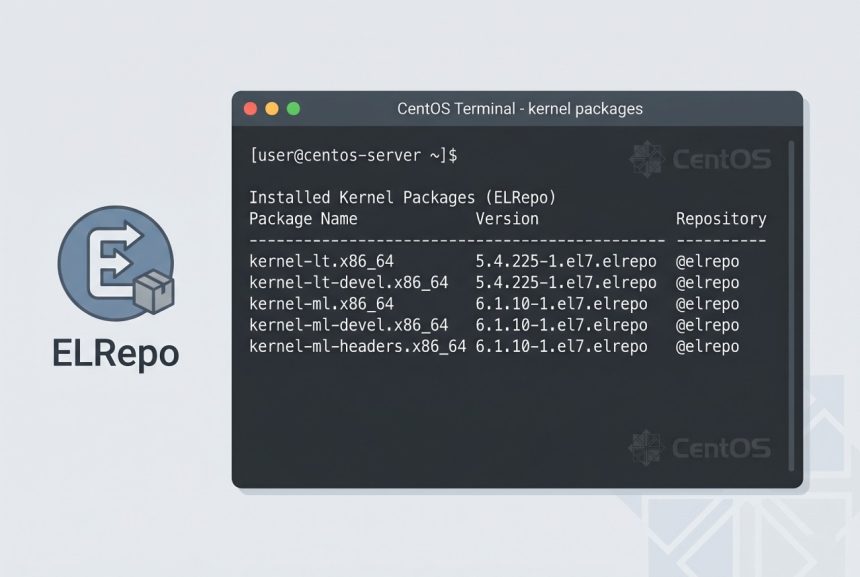
Step 4: List Available Kernels
With ELRepo enabled, list the kernel packages it offers:
yum list available --disablerepo='*' --enablerepo=elrepo-kernelLook for two key entries in the output:
- kernel-lt — Long-term support kernel. More conservative, fewer updates, longer maintenance window. Best for production servers where stability matters most.
- kernel-ml — Mainline kernel. Latest features and drivers, shorter support cycle, more frequent updates. Good for development or when you need specific hardware support.
Step 5: Install the New Kernel
Choose one of the two kernel branches and install it. You do not need to remove your current kernel — CentOS keeps multiple kernels installed side by side and lets you select at boot.
Option A: Install the Mainline Kernel
sudo yum --enablerepo=elrepo-kernel install kernel-mlOption B: Install the Long-Term Support Kernel
sudo yum --enablerepo=elrepo-kernel install kernel-ltWhen prompted to confirm the installation, type y and press Enter. The download and installation will take a minute or two depending on your connection speed.
Step 6: Reboot and Select the New Kernel
Reboot the system so GRUB picks up the newly installed kernel:
rebootWhen the GRUB boot menu appears, use the arrow keys to highlight the new kernel entry and press Enter. If you are on a remote server without console access, the newest kernel is typically the first entry in GRUB by default, so a simple reboot may boot into it automatically — but verify with uname -msr after reconnecting.
Step 7: Set the New Kernel as the Default Boot Option
After confirming the new kernel works, make it the permanent default. Open the GRUB configuration:
sudo vim /etc/default/grubFind the GRUB_DEFAULT line and set it to 0:
GRUB_DEFAULT=0This tells GRUB to boot the first entry in the menu — which is the newest kernel. Save and close the file, then regenerate the GRUB configuration:
sudo grub2-mkconfig -o /boot/grub2/grub.cfgReboot one final time and verify the new kernel is active:
rebootAfter the system comes back up, run uname -msr again. The version number should now reflect the kernel you installed in Step 5.
Troubleshooting
New Kernel Does Not Appear in GRUB Menu
If the newly installed kernel does not show up after reboot, the GRUB config may not have been regenerated. Run sudo grub2-mkconfig -o /boot/grub2/grub.cfg and reboot again.
System Boots Into the Old Kernel
Verify that GRUB_DEFAULT=0 is set in /etc/default/grub and that you regenerated the config afterward. You can also check the installed kernels and their order with awk -F\' '/menuentry / {print $2}' /boot/grub2/grub.cfg to confirm the new kernel is listed first.
ELRepo RPM Installation Fails
If the rpm -Uvh command fails with a network error, ensure your server can reach elrepo.org. On firewalled servers, you may need to allow outbound HTTPS. You can also download the RPM manually and install it from the local file.
Frequently Asked Questions
Install <strong>kernel-lt</strong> (long-term support) for production servers where stability is the priority. Install <strong>kernel-ml</strong> (mainline) if you need the latest features, drivers, or security patches that haven’t been backported to the LTS branch yet.
Yes, but it is safer to keep at least one previous kernel as a fallback. If the new kernel causes issues, you can select the old one from the GRUB boot menu. CentOS keeps multiple kernels installed by default and <code>yum</code> is configured (via <code>installonly_limit</code> in <code>/etc/yum.conf</code>) to automatically remove the oldest kernel when you exceed the limit.
CentOS 7 reached end of life on June 30, 2024. The base CentOS repositories no longer receive updates. ELRepo may continue to provide kernel packages for CentOS 7 for some time, but long-term you should plan to migrate to AlmaLinux, Rocky Linux, or another RHEL-compatible distribution.
Reboot the system and select the old kernel from the GRUB boot menu using the arrow keys. To make it the default again, change <code>GRUB_DEFAULT</code> in <code>/etc/default/grub</code> to the menu index of the old kernel (usually <code>1</code>) and run <code>sudo grub2-mkconfig -o /boot/grub2/grub.cfg</code>.
Run <code>uname -msr</code> in the terminal. This prints the kernel name, version, and machine hardware architecture. For more detail, use <code>uname -a</code> to see the full kernel version string including the build date.
Related Guides
For the official ELRepo documentation and available packages, see elrepo.org.