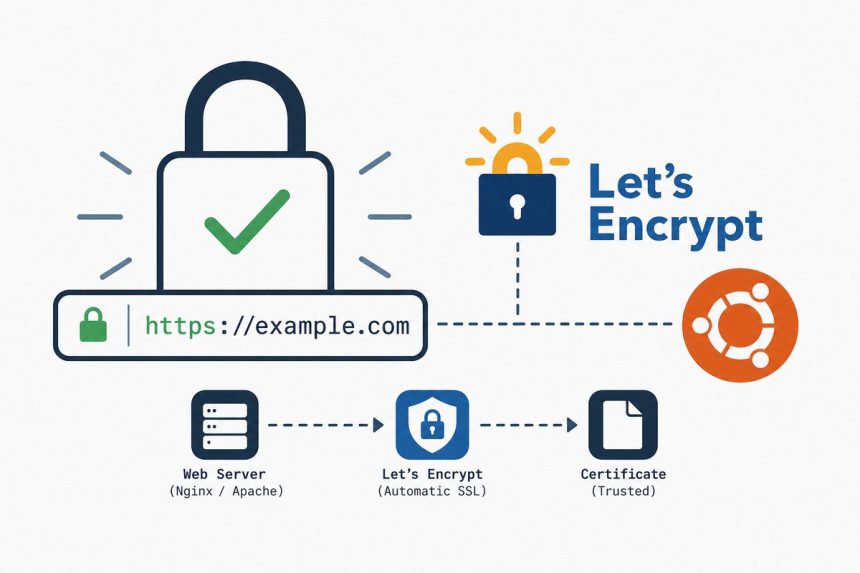
To set up Let’s Encrypt SSL on Ubuntu, install Certbot, run it with the matching plugin for your web server (--apache or --nginx), and let it write the cert paths and config snippets for you. Certbot also installs a systemd timer that auto-renews every cert before it expires — the certificate lifecycle is hands-off after the initial run.
- TL;DR
- Prerequisites
- Step 1 — install Certbot and the right plugin
- Step 2 — run Certbot
- Step 3 — what Certbot wrote
- Step 4 — confirm auto-renewal works
- Force HTTPS — what the redirect change actually does
- Wildcard certificates — DNS-01 challenge
- Common failures
- Verify externally
- Frequently asked questions
- Related guides
- References
Last verified: 2026-05-17 on Ubuntu 24.04 with Certbot 2.x, Apache 2.4, and Nginx 1.24.
TL;DR
# Apache
sudo apt update
sudo apt install -y certbot python3-certbot-apache
sudo certbot --apache -d example.com -d www.example.com

# Nginx
sudo apt install -y certbot python3-certbot-nginx
sudo certbot --nginx -d example.com -d www.example.com
Pick the line for your web server and run it. Certbot prompts for your email (used for renewal-failure notifications), shows the rewritten config, and asks if you want to redirect HTTP to HTTPS. After it’s done, the site serves a valid Let’s Encrypt certificate.
Prerequisites
- A domain whose A record already points at this server’s public IP. Certbot’s HTTP-01 challenge requires Let’s Encrypt to reach
http://your-domain/.well-known/acme-challenge/...on your server — that needs DNS pointing at you, not at Cloudflare’s proxy or another host. - Ports 80 and 443 open in your firewall and at any upstream provider’s network ACL.
- A working Apache or Nginx install serving your domain on port 80. (For a fresh box, see How to Install the Apache Web Server on Ubuntu.)
- Root or
sudoaccess.
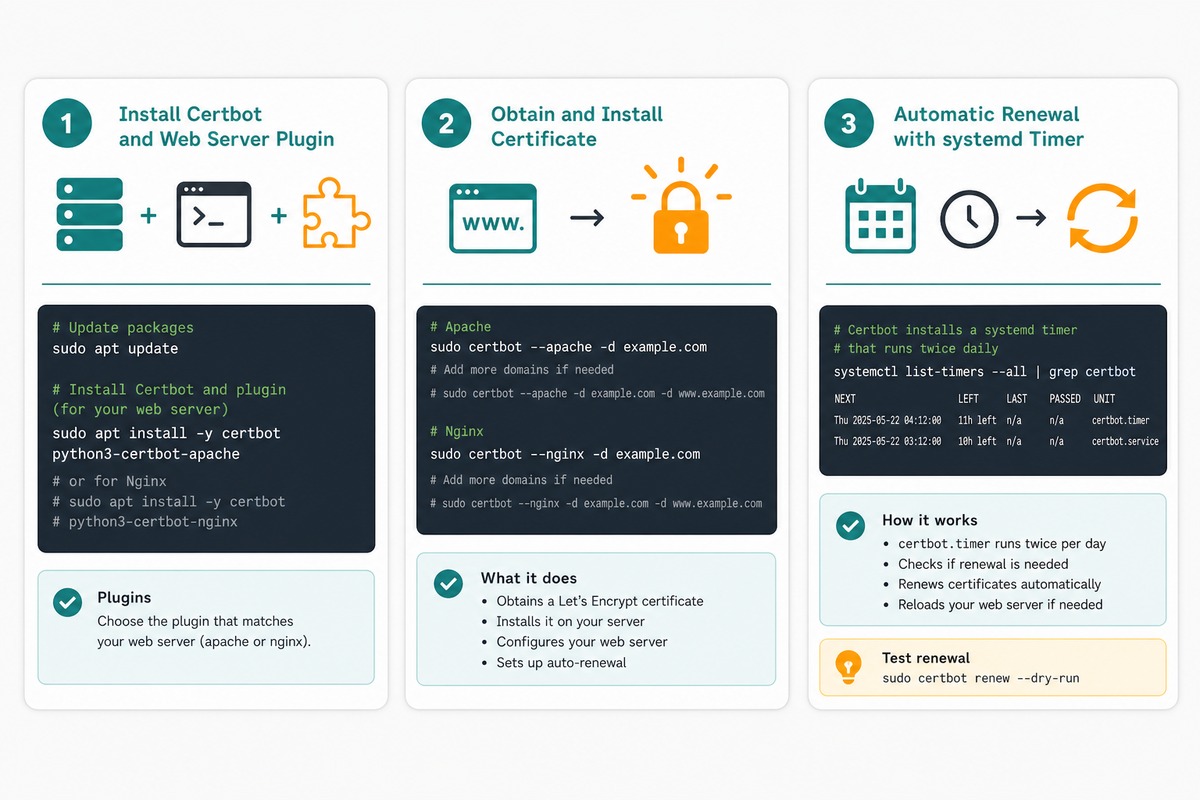
Step 1 — install Certbot and the right plugin
sudo apt update

# Apache servers
sudo apt install -y certbot python3-certbot-apache

# Nginx servers
sudo apt install -y certbot python3-certbot-nginx
The plugin (python3-certbot-apache or python3-certbot-nginx) does two things: it picks up your web-server config to insert the new SSL block, and it reloads the server after writing the cert. Without the plugin you’d have to wire those steps up by hand.
Ubuntu’s repos ship a recent-enough Certbot. The older guidance to install via snap exists for users on long-stale LTSes — on Ubuntu 22.04 and 24.04, apt is fine.
Step 2 — run Certbot
# Apache
sudo certbot --apache -d example.com -d www.example.com

# Nginx
sudo certbot --nginx -d example.com -d www.example.com
Both forms run interactively. You’ll see prompts for:
- Email address — Let’s Encrypt uses this only to warn you about pending renewals or revocations. Use a real, monitored address.
- Terms of Service — agree with
Y. - Marketing email opt-in — your call.
- Redirect HTTP to HTTPS? — say
2(redirect) for nearly every site. Certbot will rewrite your web-server config to sendLocation: https://...on port 80. The only case where you’d say “no” is sites that need to serve a plain-HTTP endpoint for legacy clients, which is rare.
Certbot completes the HTTP-01 challenge, fetches the certificate, writes it to /etc/letsencrypt/live/example.com/, modifies your web-server config to point at it, and reloads Apache or Nginx. The whole run usually takes 5–15 seconds.
Step 3 — what Certbot wrote
# Cert files (don't edit these directly)
/etc/letsencrypt/live/example.com/fullchain.pem   # cert + intermediate
/etc/letsencrypt/live/example.com/privkey.pem     # private key
/etc/letsencrypt/live/example.com/chain.pem       # intermediate only
/etc/letsencrypt/live/example.com/cert.pem        # leaf cert only

# Apache config updates
/etc/apache2/sites-available/example.com-le-ssl.conf   # new SSL vhost
/etc/apache2/sites-available/example.com.conf          # http -> https redirect added

# Nginx config updates
/etc/nginx/sites-available/example.com    # one server block now listens on 443 with TLS
The files under live/ are actually symlinks to versioned copies under archive/. When Certbot renews, the targets change but the paths stay the same — so your web-server config never needs updating again.
Step 4 — confirm auto-renewal works
# See the renewal timer
systemctl list-timers | grep certbot

# Dry-run the renewal — does not actually request a new cert
sudo certbot renew --dry-run
The Certbot package installs certbot.timer, a systemd timer that fires twice daily and runs certbot renew. Certificates that are within 30 days of expiry get renewed; everything else is a no-op. The dry-run command exercises the entire renewal path without consuming a real certificate from Let’s Encrypt — use it whenever you change DNS, web-server config, or firewall rules to make sure renewal will still succeed.
If you see “Congratulations, all simulated renewals succeeded” you’re done. Forever, more or less — Certbot also reloads the web server automatically after a successful renewal.
Force HTTPS — what the redirect change actually does
When you answered 2 to “Redirect HTTP to HTTPS?”, Certbot updated your config to send 301 Moved Permanently on every port-80 request. The result varies by web server:
# Apache — added to the *:80 vhost
RewriteEngine on
RewriteCond %{SERVER_NAME} =example.com [OR]
RewriteCond %{SERVER_NAME} =www.example.com
RewriteRule ^ https://%{SERVER_NAME}%{REQUEST_URI} [END,NE,R=permanent]

# Nginx — added to the port-80 server block
return 301 https://$host$request_uri;
If you skipped this prompt and want to add it later, re-run sudo certbot --apache / --nginx with no arguments — it’ll detect the existing cert and offer to add the redirect.
Wildcard certificates — DNS-01 challenge
To cover example.com, www.example.com, blog.example.com, api.example.com, etc. with one cert, request a wildcard. Wildcards require the DNS-01 challenge, which means Certbot needs to write a TXT record on your DNS provider — that requires the right plugin and an API token. Cloudflare is the most common host; the pattern is the same for the others.
# Install the Cloudflare plugin
sudo apt install -y python3-certbot-dns-cloudflare

# Create an API token file (root-only access)
sudo install -m 600 /dev/null /root/.cloudflare.ini
sudo tee /root/.cloudflare.ini >/dev/null << 'EOF'
dns_cloudflare_api_token = your-token-from-cloudflare-dashboard
EOF

# Request a wildcard
sudo certbot certonly \
    --dns-cloudflare \
    --dns-cloudflare-credentials /root/.cloudflare.ini \
    -d example.com -d '*.example.com'
certonly obtains the certificate but doesn’t touch web-server config — for wildcards you usually want to wire the cert into the config yourself, since there’s no single “this is the SSL vhost for *.example.com” to auto-edit. Point your Nginx ssl_certificate and ssl_certificate_key directives at /etc/letsencrypt/live/example.com/fullchain.pem and privkey.pem respectively.
Common failures
- DNS not propagated yet. Let’s Encrypt verifies that
example.comresolves to your server’s IP. If you only just pointed the A record, wait —dig example.com +shortfrom the server should return its own IP before you run Certbot. - Port 80 blocked. The HTTP-01 challenge always uses port 80, regardless of whether your real site is HTTPS-only. If UFW or your cloud provider’s firewall blocks port 80, Certbot fails.
sudo ufw allow 80/tcpon the server; double-check the provider’s network ACL too. - Rate limit hit. Let’s Encrypt allows 5 certificates per registered domain per week and 50 per top-level domain per week. If you’re testing repeatedly, use the staging endpoint:
certbot --staging --apache -d ...— staging certs aren’t browser-trusted but don’t count against the limit. - Conflicting Apache rewrite rules. If you already have an unconditional rewrite to HTTP (e.g. from an old .htaccess), Certbot’s HTTP-01 challenge fails because the challenge URL gets redirected. Inspect
/var/log/letsencrypt/letsencrypt.log— the last 100 lines almost always show the exact HTTP code and URL that failed. - Cloudflare proxying. If your DNS is “orange-clouded” through Cloudflare, the A record resolves to Cloudflare’s edge, not your origin. Either temporarily set the record to “DNS only” while running Certbot, or use the DNS-01 challenge instead.
Verify externally
# Quick check from the command line
curl -sI https://example.com | head -n 1
# HTTP/2 200

# Server header should match the web server you configured
curl -sI https://example.com | grep -i server

# Cert details
echo | openssl s_client -servername example.com -connect example.com:443 2>/dev/null \
    | openssl x509 -noout -issuer -dates -subject
For a full grade, run the domain through SSL Labs. With Certbot’s stock config and modern Apache or Nginx you should land on an A rating without further tuning. To reach A+, add HSTS (Strict-Transport-Security header), enable OCSP stapling, and disable TLS 1.0/1.1 — Certbot doesn’t do this by default because it can break older clients you might still need to support.
Frequently asked questions
HTTP-01 is Certbot’s default — it places a token at /.well-known/acme-challenge/ on your web server, and Let’s Encrypt fetches it over plain HTTP. Works for any domain your web server already answers for, requires port 80 open. DNS-01 proves ownership by writing a TXT record at _acme-challenge.{domain}. Slower (DNS propagation) and needs API access to your DNS provider, but it’s the only path for wildcard certificates (*.example.com) and for servers that aren’t publicly reachable on port 80.
Browsers show a hard error page on expired certs and most users back out. Certbot installs a systemd timer (certbot.timer) that runs twice a day and renews any cert within 30 days of expiry, so as long as the timer is active you never reach the cliff. Verify with systemctl list-timers | grep certbot. If you ever turned the timer off, re-enable with sudo systemctl enable --now certbot.timer.
Use the DNS-01 challenge with Certbot’s DNS plugin for your provider — there are official plugins for Cloudflare, Route 53, DigitalOcean, Google, Linode, OVH, and more. The Cloudflare one is the most common: apt install python3-certbot-dns-cloudflare, store an API token in /root/.cloudflare.ini, then certbot certonly --dns-cloudflare --dns-cloudflare-credentials /root/.cloudflare.ini -d example.com -d '*.example.com'. Wildcards always require DNS-01.
Standalone binds Certbot to port 80 directly for the challenge — use it on a fresh server before you’ve installed a web server, or when you want Certbot to fully own the certificate workflow. Webroot just drops the challenge file into an existing document root — use it when your web server is already running and you’d rather not stop it. The Apache/Nginx plugins (used in this guide) wrap webroot plus config rewriting, which is what most installs actually want.
Related guides
- How to Install the Apache Web Server on Ubuntu
- How to Redirect www to non-www in Nginx
- How to Configure Nginx for a Subdirectory
- How to Change the Default SSH Port on Linux
References
Certbot user guide: eff-certbot.readthedocs.io. Certbot instructions matrix (per-OS): certbot.eff.org/instructions. Let’s Encrypt rate limits: letsencrypt.org/docs/rate-limits. SSL Labs test: ssllabs.com/ssltest.