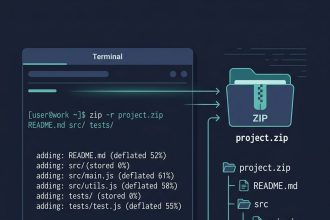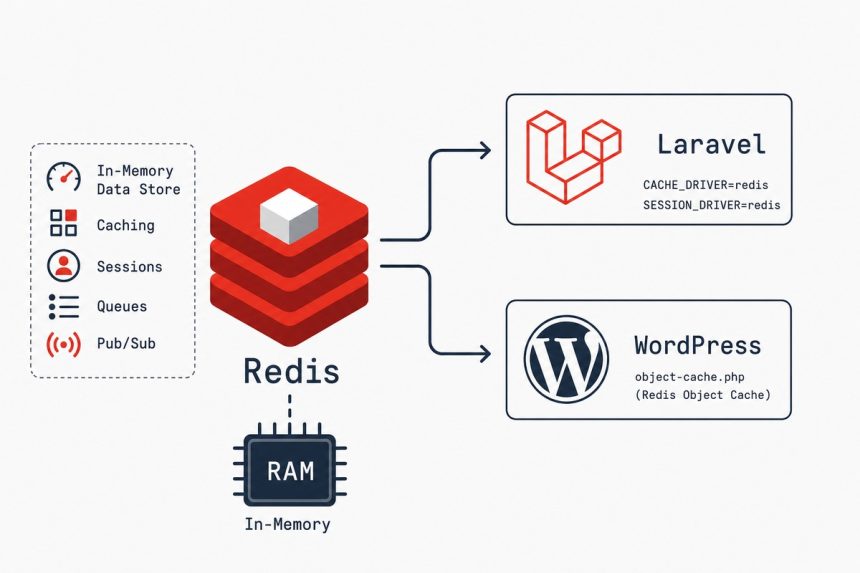
To install Redis on Ubuntu and wire it into a PHP stack (Laravel, WordPress, plain PHP), install the redis-server and php-redis packages, bind Redis to localhost with a password, and update your app’s environment to point at it. Redis takes over from the default file-based cache and slots in as a queue/session/object-cache driver — the same install supports all three use cases simultaneously.
Last verified: 2026-05-17 on Ubuntu 24.04 with Redis 7.x, PHP 8.3, Laravel 11, and WordPress 6.5.
TL;DR
sudo apt update
sudo apt install -y redis-server php-redis

# Secure: set a password, ensure it binds to localhost
# Edit /etc/redis/redis.conf (details below)

sudo systemctl enable --now redis-server
redis-cli ping
# PONG
Step 1 — install
sudo apt update
sudo apt install -y redis-server
Ubuntu 22.04 ships Redis 6.x; Ubuntu 24.04 ships 7.x. Both are recent enough for any current PHP framework. If you need the absolute latest, the upstream redis.io APT repository has it, but the distro package is fine for production use.
The install starts the service automatically and binds Redis to 127.0.0.1:6379. Verify:
redis-cli ping
# PONG

systemctl is-active redis-server
# active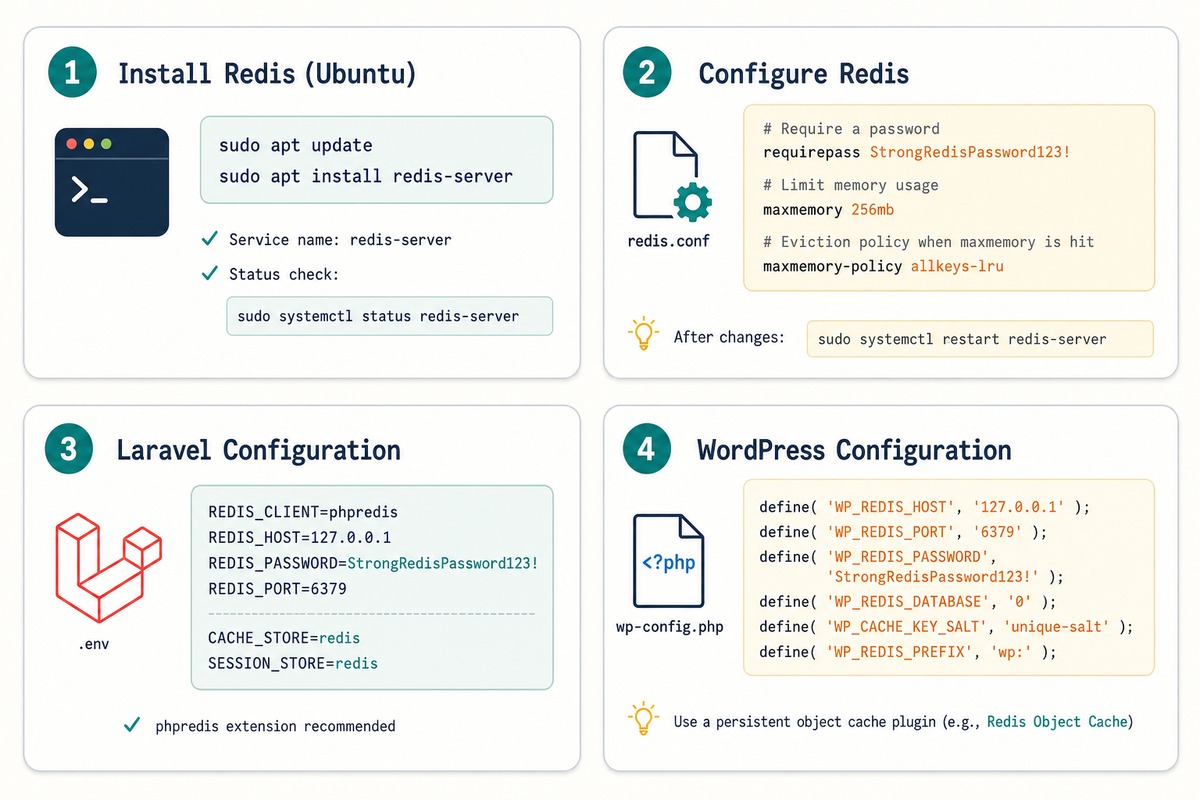
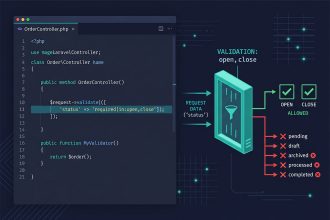
Step 2 — secure Redis
The default install binds to localhost only — good. But it has no password by default, which means any local user on the box can read or modify cached data. Add one:
sudo nano /etc/redis/redis.confFind and edit these directives:
bind 127.0.0.1 ::1                              # localhost only — leave as-is unless multi-host
protected-mode yes                              # refuse external connections when no auth set
requirepass YourStrongRandomPasswordHere        # uncomment and replace
maxmemory 256mb                                 # cap memory use (tune for your box)
maxmemory-policy allkeys-lru                    # evict least-recently-used when full
appendonly yes                                  # persist to disk (AOF)
appendfsync everysec                            # sync to disk every second (safe + fast)
Generate the password with openssl rand -base64 32. Restart Redis to apply:
sudo systemctl restart redis-server

# Verify auth is required
redis-cli ping
# (error) NOAUTH Authentication required.

# Authenticate first
redis-cli -a 'YourStrongRandomPasswordHere' ping
# PONG
Step 3 — install the PHP extension
sudo apt install -y php-redis

# Restart PHP-FPM (and Apache if mod_php)
sudo systemctl reload php8.3-fpm
sudo systemctl reload apache2        # only if using mod_php

# Confirm
php -m | grep -i redis
# redis
php-redis is the native C extension. It’s faster than Predis (the PHP-only alternative) and is the default for Laravel and WordPress object-cache packages. Predis is still useful when you can’t install PHP extensions — managed hosting, etc. — but on a VPS where you have root, install the native one.
Step 4 — Laravel setup
Update your .env:
REDIS_HOST=127.0.0.1
REDIS_PORT=6379
REDIS_PASSWORD=YourStrongRandomPasswordHere
REDIS_CLIENT=phpredis

CACHE_STORE=redis
SESSION_DRIVER=redis
QUEUE_CONNECTION=redis

# Use a separate logical database per workload (optional but tidy)
REDIS_DB=0
REDIS_CACHE_DB=1
Then clear cached config:
php artisan config:clear

# In production, re-cache after .env changes
php artisan config:cache

# Reload PHP-FPM so long-lived workers pick up the new config
sudo systemctl reload php8.3-fpm
Test from Tinker:
php artisan tinker
# Inside Tinker
Cache::put('test', 'hello', 60);
Cache::get('test'); // "hello"
# And via redis-cli — should see the key
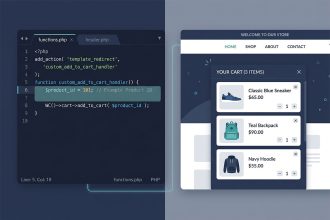
redis-cli -a '...' KEYS '*test*'Step 5 — WordPress setup
Install the Redis Object Cache plugin (or via WP-CLI: wp plugin install redis-cache --activate).
Add the connection details to wp-config.php above the “That’s all, stop editing!” line:
// wp-config.php
define( 'WP_REDIS_HOST',     '127.0.0.1' );
define( 'WP_REDIS_PORT',     6379 );
define( 'WP_REDIS_PASSWORD', 'YourStrongRandomPasswordHere' );
define( 'WP_REDIS_DATABASE', 2 );   // separate DB from Laravel etc.
define( 'WP_REDIS_PREFIX',   'wp:' );
Then in the WP admin, go to Settings → Redis and click Enable Object Cache. The plugin drops in wp-content/object-cache.php (the WordPress drop-in convention) and starts serving cached objects from Redis.
Confirm with wp redis status (WP-CLI) or by watching redis-cli MONITOR while you browse the admin.
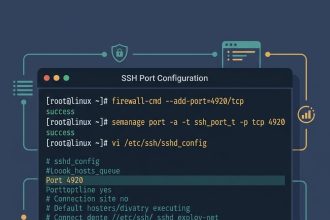
Step 6 — UFW and SELinux
Since Redis binds to localhost, no firewall change is needed for a single-server install — port 6379 is never reachable from outside the box. If UFW is on, leave it that way.
For a multi-server setup where Redis is on a separate host and accessed over a private network, bind Redis to the private IP (bind 10.0.0.5 127.0.0.1), open the port to just the trusted IPs (sudo ufw allow from 10.0.0.10 to any port 6379), and absolutely use requirepass — Redis on a public network without auth is a freshly-rooted server waiting to happen.
Step 7 — monitor and tune
# Server stats
redis-cli -a '...' INFO server
redis-cli -a '...' INFO memory
redis-cli -a '...' INFO stats

# Live command stream (Ctrl+C to exit) — verifies traffic
redis-cli -a '...' MONITOR

# Slow queries (over 10ms by default)
redis-cli -a '...' SLOWLOG GET 10

# Database size
redis-cli -a '...' DBSIZE
The metrics that matter:
used_memory_humaninINFO memory— current memory use. Compare tomaxmemory.evicted_keysinINFO stats— keys dropped due tomaxmemory. Steady eviction = cache too small; bursty = ok.keyspace_hits/keyspace_misses— hit rate. Anything under 80% on a steady-state app is worth investigating.
Common failures
- “NOAUTH Authentication required” — you set a password but the client (Laravel, WordPress, redis-cli) doesn’t have it. Re-check
REDIS_PASSWORD/WP_REDIS_PASSWORD. - “DENIED Redis is running in protected mode” — you’re trying to connect from a different host but haven’t set a password or adjusted
bind. Setrequirepassand add the listening IP tobind. - Out-of-memory crashes — Redis hit the system OOM killer because
maxmemorywasn’t set. Set it to something less than physical RAM so Redis’s own LRU eviction kicks in first. - Slow performance — check
SLOWLOG GET;KEYS *calls in application code (instead ofSCAN) lock the server for the duration of the scan. Find and fix.
Frequently asked questions
Both are in-memory key/value stores. Memcached is simpler — string values only, no persistence, sharding via the client. Redis supports rich data types (hashes, lists, sets, sorted sets, streams), optional persistence to disk, pub/sub, Lua scripting, atomic transactions, and key expiry semantics that Memcached lacks. For Laravel queues, WordPress object cache, or anything beyond plain string caching, Redis is the obvious pick. For a tiny session-cache use case with no other needs, Memcached is fine and a bit lighter.
redis-cli ping work but Laravel still uses the file cache? Laravel reads cache configuration at boot and (in production) from bootstrap/cache/config.php. After changing .env, you need to refresh the cached config: php artisan config:clear (development) or php artisan config:cache (production). If you’re running PHP-FPM, also reload it (sudo systemctl reload php8.3-fpm) — long-lived FPM workers keep the old config in memory until they recycle.
For a single-server setup with one web app, run it on the same box — it’s a local Unix-socket connection, latency is sub-millisecond, and Redis’s memory footprint is small. For multi-server setups where multiple web nodes share a cache, run Redis on its own host on the private network. Never expose Redis to the public internet — historical default config has no auth, and there are well-known wormable RCE patterns against unauthenticated Redis.
Set maxmemory to half of available RAM if Redis is the dominant workload, less if it shares the box with MySQL/PHP. With maxmemory-policy allkeys-lru, Redis evicts least-recently-used keys when it hits the limit — cache use cases can run at full memory without issues. For workloads where every key must persist (queue, session store), pick a policy like noeviction and size memory so you never reach the limit.
Related guides
- How to Install Laravel
- How to Install PHP on Ubuntu
- How to Install MySQL on Ubuntu
- How to Create a Login and Registration System in Laravel
- How to Harden a Fresh Ubuntu VPS
References
Redis documentation: redis.io/docs. PhpRedis extension: github.com/phpredis/phpredis. Redis Object Cache for WordPress: github.com/rhubarbgroup/redis-cache. Laravel cache documentation: laravel.com/docs/cache.