To auto-start Apache and MySQL with XAMPP on Windows, you have two options: enable the Autostart checkboxes in the XAMPP Control Panel (plus a startup shortcut), or install Apache and MySQL as proper Windows services. Both work; services are more bulletproof because they start before login and survive logouts. This guide covers both methods, plus how to undo each.
Last verified: 2026-05-17 with XAMPP for Windows 8.2.x. Originally published 2022-12-10, rewritten and updated 2026-05-17.
Method 1 — Autostart inside the XAMPP Control Panel
- Right-click the XAMPP Control Panel shortcut → Run as administrator (required so XAMPP can save the config).
- Click the Config button (top right of the panel).
- Under Autostart of modules, tick Apache and MySQL.
- Click Save.
Apache and MySQL will now start every time you launch the XAMPP Control Panel. To also launch the panel when Windows starts:
- Press Win+R, type
shell:common startup, hit Enter. - A Startup folder opens.
- Right-click a blank area → New → Shortcut → point it at
C:\xampp\xampp-control.exe→ Finish. - Right-click the shortcut → Properties → Advanced → tick Run as administrator.
Reboot. The Control Panel launches and starts Apache + MySQL automatically.
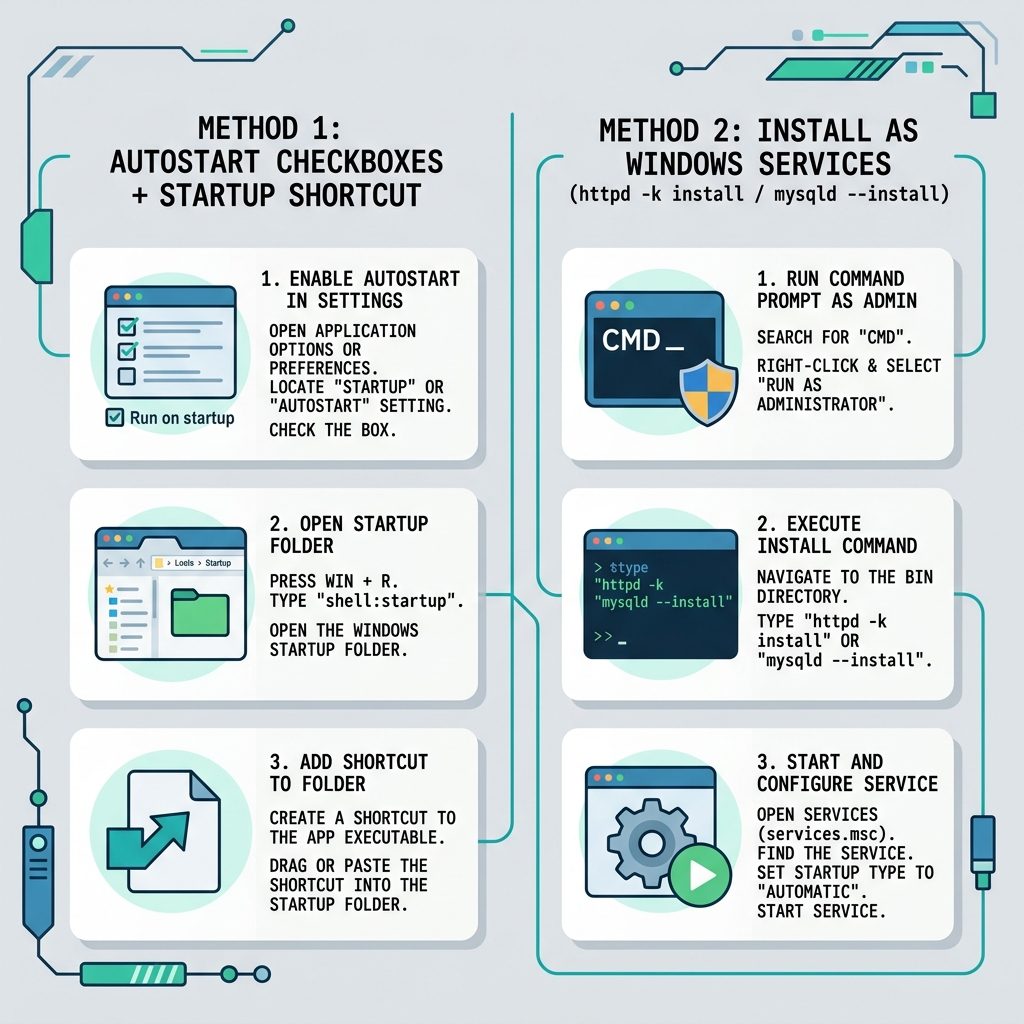
Method 2 — Install Apache and MySQL as Windows services
Cleaner, more bulletproof: register both as proper Windows services. They start before any user logs in and run under the SYSTEM account.
First, stop both modules in the XAMPP Control Panel (you can’t install a service while the binary is already running).
Open cmd as Administrator:
:: Install Apache as a service
cd C:\xampp\apache\bin
httpd.exe -k install
:: Install MySQL as a service
cd C:\xampp\mysql\bin
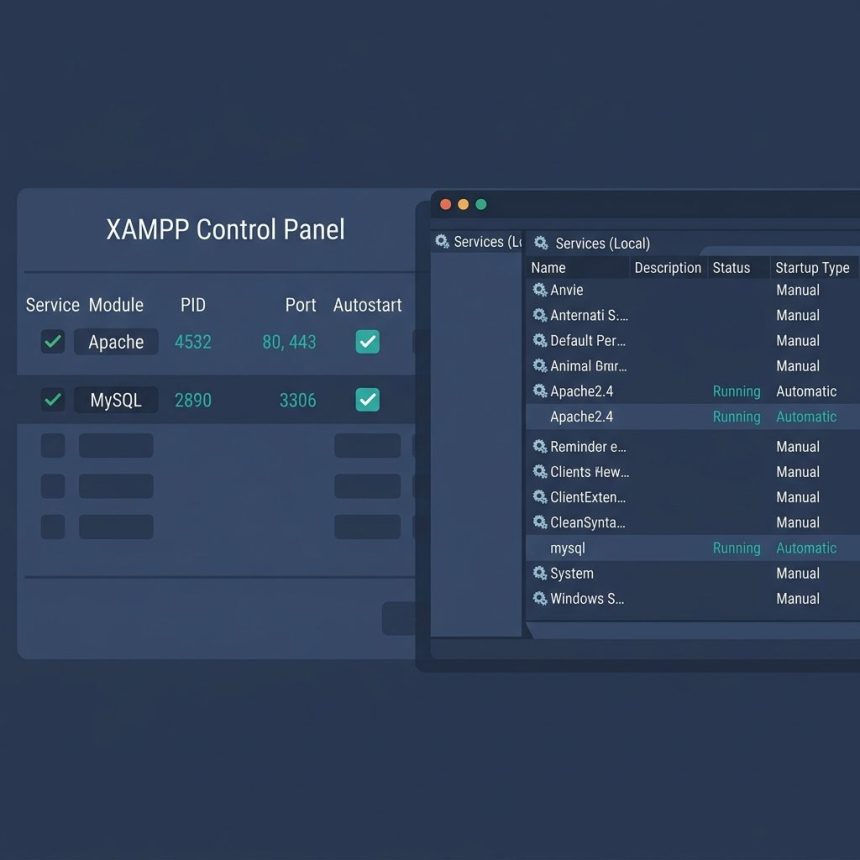
mysqld.exe --installEither reboot, or open services.msc and start Apache2.4 and mysql manually. After that they’ll auto-start on every boot. The XAMPP Control Panel will show a green check next to the Service column once each is registered.
Undo Method 2
:: Run cmd as Administrator
cd C:\xampp\apache\bin
httpd.exe -k uninstall

cd C:\xampp\mysql\bin
mysqld.exe --remove
Frequently asked questions
If you want Apache and MySQL running without ever opening the XAMPP Control Panel, install them as Windows services (Method 2). They’ll start before login, run under the SYSTEM account, and survive logouts. If you’d rather see the XAMPP control panel and have it auto-start the modules when you log in, use the Autostart checkbox method (Method 1) plus the shell:common startup shortcut. Both are valid; services are the ‘set it and forget it’ option.
Most often, another service is already bound to the port (80/443 for Apache, 3306 for MySQL). Skype, IIS, World Wide Web Publishing Service, or a previous MySQL install are typical culprits. Run netstat -ano | findstr :80 and netstat -ano | findstr :3306 to find the PID using the port, then stop or uninstall the offender. Restart the XAMPP service afterwards.
Yes for the install steps (httpd.exe -k install and mysqld.exe --install) — service registration requires admin privileges. After install, the services run as SYSTEM, so day-to-day use doesn’t need admin. The Autostart checkbox in the XAMPP control panel also needs admin to be saved persistently.
Run cmd as Administrator. For Apache: cd C:\xampp\apache\bin then httpd.exe -k uninstall. For MySQL: cd C:\xampp\mysql\bin then mysqld.exe --remove. The XAMPP control panel’s Service column will go back to the red X afterwards.
The services persist across normal Windows updates and reboots. Feature updates (Windows version upgrades) sometimes reset Service start-types to Manual — if the modules stop auto-starting after a big update, open services.msc, find Apache2.4 and mysql, and set Startup type back to Automatic.
Related guides
References
XAMPP on Windows FAQ: apachefriends.org/faq_windows.html. Apache httpd.exe service options: httpd.apache.org/docs/2.4/platform/windows.html.