Ubuntu’s default MariaDB package lags the upstream release by 1–2 major versions, which means missing features, slower release of security fixes, and shorter support windows. This guide shows how to install MariaDB on Ubuntu 24.04 from the official MariaDB APT repository — specifically the 11.4 LTS branch, which has support through 2029 — plus the secure-install ritual, sensible my.cnf defaults, and the gotchas if you’re migrating from MySQL.
- TL;DR
- Why use the official MariaDB repo (not Ubuntu’s)
- Step 1 — Add the MariaDB APT repository
- Step 2 — Install MariaDB server and client
- Step 3 — Run the secure-installation wizard
- Step 4 — Create your application database and user
- Step 5 — Set sensible defaults in my.cnf
- Migrating from MySQL
- Troubleshooting
- Related guides
TL;DR
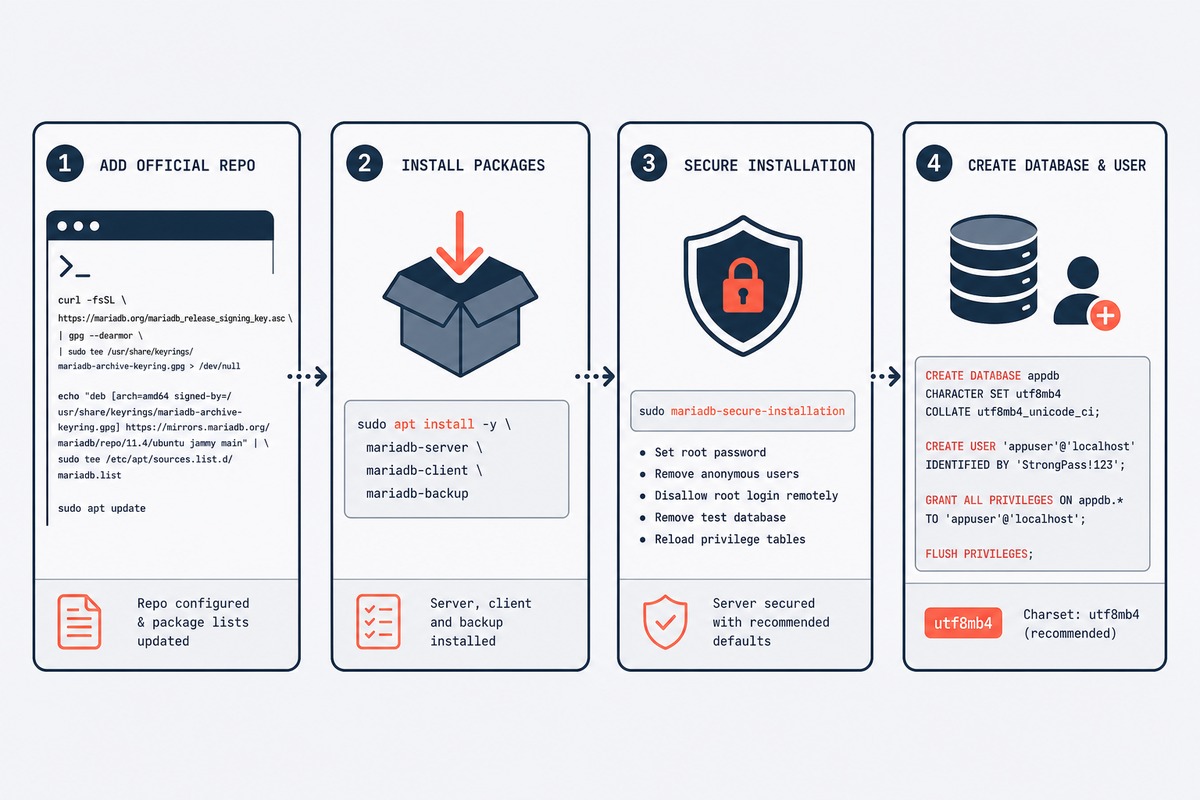
Add MariaDB’s official repository with their setup script, apt install mariadb-server mariadb-client, run mariadb-secure-installation, create your application database and user, and set character-set-server = utf8mb4 in /etc/mysql/mariadb.conf.d/50-server.cnf. The whole sequence is about ten minutes on a fresh VPS.
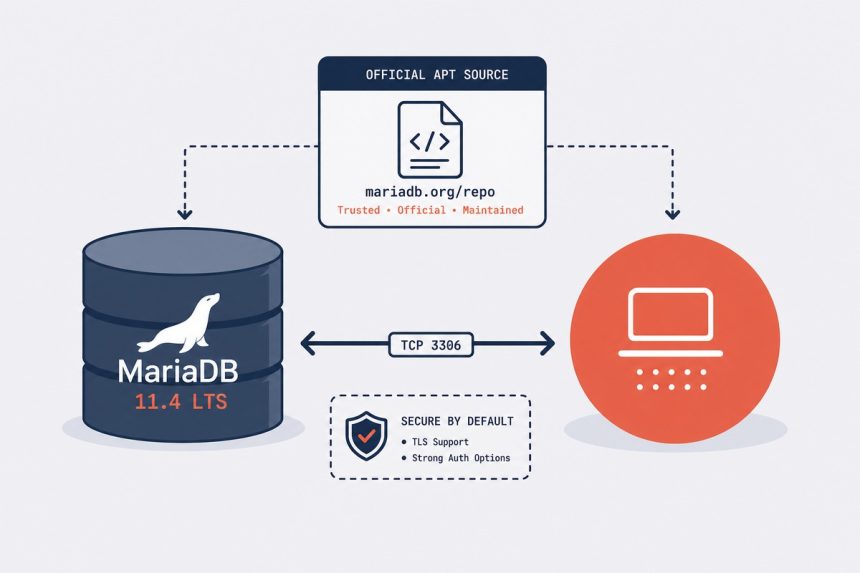
Why use the official MariaDB repo (not Ubuntu’s)
- Current versions. Ubuntu 24.04 ships MariaDB 10.11. MariaDB 11.4 LTS is the current stable LTS with support through July 2029.
- Faster security patches. MariaDB Foundation ships fixes within days; Ubuntu’s process adds 1–4 weeks of backport delay.
- Identical packaging. The official packages keep Ubuntu’s package names, service names, and config layouts. You’re not switching distributions, just sources.
Step 1 — Add the MariaDB APT repository
MariaDB provides a one-shot setup script that picks the right repo for your distro version, installs the signing key, and writes the apt sources file:
curl -LsS https://r.mariadb.com/downloads/mariadb_repo_setup | sudo bash -s -- --mariadb-server-version="mariadb-11.4"The --mariadb-server-version flag pins to the 11.4 LTS series. Without it, the script picks the latest stable, which might be a short-term release (11.5, 11.6) with shorter support.
If you’d rather inspect what the script does before running it, fetch and read it first: curl -LsS https://r.mariadb.com/downloads/mariadb_repo_setup > setup.sh && less setup.sh. It’s ~200 lines of bash and self-explanatory.
Step 2 — Install MariaDB server and client
sudo apt update
sudo apt install mariadb-server mariadb-client
The server starts immediately and is enabled to boot with systemd. Confirm:
sudo systemctl status mariadb
mariadb --version
You should see Server version: 11.4.x-MariaDB or similar.
Step 3 — Run the secure-installation wizard
sudo mariadb-secure-installationIt will ask seven questions. The defaults are sensible for almost every production install:
- Current root password? Press Enter — there isn’t one yet on a fresh install.
- Switch to unix_socket authentication? Yes. This is the modern MariaDB default: root connects via Unix socket as the OS root user, no password needed locally. Remote root access is disabled.
- Change the root password? No (since you’re using unix_socket).
- Remove anonymous users? Yes.
- Disallow root login remotely? Yes.
- Remove test database? Yes.
- Reload privilege tables now? Yes.
Step 4 — Create your application database and user
Drop into the MariaDB shell as root (now via unix_socket — no password):
sudo mariadbCreate a database and a user that owns it. Use a strong password — generate one with openssl rand -base64 24 if you don’t have a password manager open:
CREATE DATABASE myapp CHARACTER SET utf8mb4 COLLATE utf8mb4_unicode_ci;
CREATE USER 'myapp'@'localhost' IDENTIFIED BY 'long-random-password-here';
GRANT ALL PRIVILEGES ON myapp.* TO 'myapp'@'localhost';
FLUSH PRIVILEGES;
EXIT;
The utf8mb4 character set is essential — it’s the only one that supports the full Unicode range, including emoji and many Asian-language characters. The older utf8 (alias for utf8mb3) silently breaks on 4-byte characters. Always use utf8mb4 for new databases.
Step 5 — Set sensible defaults in my.cnf
Edit /etc/mysql/mariadb.conf.d/50-server.cnf and ensure these are set under [mariadbd]:
[mariadbd]
character-set-server   = utf8mb4
collation-server       = utf8mb4_unicode_ci
default-storage-engine = InnoDB

# InnoDB buffer pool: 50-70% of system RAM on a DB-dedicated server
innodb_buffer_pool_size = 1G

# Log slow queries above 1 second
slow_query_log = 1
slow_query_log_file = /var/log/mysql/slow.log
long_query_time = 1

# Bind only to localhost unless you need remote access
bind-address = 127.0.0.1
Restart for the changes to apply:
sudo systemctl restart mariadbThe innodb_buffer_pool_size is the single most impactful setting. On a 4 GB VPS dedicated to the database, set it to 2–3 GB. On a shared server running PHP + nginx + MariaDB on 2 GB, 512 MB is safer. Too high and the OS starts swapping; too low and you’re hitting disk constantly for queries that should be in memory.
Migrating from MySQL
MariaDB is a drop-in replacement for MySQL up through MySQL 5.7. For MySQL 8.0+, there are minor compatibility gaps (notably JSON functions and CTE behaviour) but most applications run unchanged. The migration is:
- Dump every database from MySQL:
mysqldump --all-databases --single-transaction --routines --triggers > backup.sql - Stop MySQL:
sudo systemctl stop mysql - Install MariaDB (this guide).
- Load the dump:
sudo mariadb - Restart your applications — most won't notice the swap. WordPress, Laravel, Django, and Rails are all MariaDB-compatible without code changes.
Troubleshooting
"Access denied for user 'root'@'localhost'"
You're trying to connect as root via password but MariaDB's secure install switched you to unix_socket. Use sudo mariadb (sudo to switch OS users, no password needed). For password-based root access, edit the user inside the shell: ALTER USER 'root'@'localhost' IDENTIFIED VIA mysql_native_password USING PASSWORD('newpass');
"Port 3306 already in use"
Another database is bound to the port — usually a leftover MySQL install. Check with sudo lsof -i :3306, stop the offending service, and either remove it (sudo apt remove mysql-server) or move it to a different port via its own config.
Up to MySQL 5.7, yes — schema and SQL syntax match. For MySQL 8.0+, MariaDB has diverged on a few features: JSON path functions are slightly different, default authentication plugins differ, and some 8.0 features (window function frames, lateral derived tables) lag MariaDB by a release or two. For typical web-app workloads (WordPress, Laravel, Django, Rails) the swap is invisible. For high-end MySQL 8.0 features, audit first.
MariaDB has two release streams — rolling short-term releases (5–6 month support) and long-term LTS (5 years support). 11.4 is the current LTS, released May 2024, supported until July 2029. The short-term releases (11.5, 11.6) are fine for desktop and dev environments but not what you want for a production server.
For a single-app server, install on the host — simpler operationally and one less abstraction layer. For multi-service hosts, Docker (or Podman) is fine, especially with a docker-compose pattern that keeps data volumes outside the container. The performance penalty is negligible on modern Linux.
Yes, by binding them to different ports (3306 and 3307 are common). They're separate daemons with separate data directories. The MariaDB and MySQL packages will conflict if installed via the same package manager; install one from apt and the other via tarball or Docker.
For dev/staging: mariadb-dump on a cron job, store output in S3 / R2 / Backblaze B2. For production: combine logical (mariadb-dump) with physical (mariabackup, the modern replacement for xtrabackup). Mariabackup gives you hot backups without locking tables. Test restores monthly — backups you've never restored are not backups.
On a database-dedicated server, 50–70% of system RAM. Above that, the OS doesn't have enough memory for file cache and you start hitting swap. On a shared server (DB + PHP + nginx), aim for 25–40% of total RAM. The dataset's hot set is what fits matters — if your active queries touch 200 MB of data, a 2 GB buffer pool helps more than 8 GB.
Related guides
- Install MySQL on Ubuntu — the upstream alternative if you'd rather stay with Oracle's distribution.
- Restart MariaDB server — the most-needed operational command.
- MariaDB not starting — troubleshooting — what to check when systemd reports the service failed.
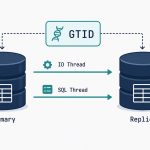
- Disable MySQL binary logging — relevant if you don't need replication and want to reclaim disk space.
For full configuration reference and release notes, the MariaDB Server documentation is canonical.